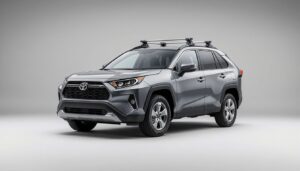
If you drive a Toyota RAV4, you probably love adventure and need extra space sometimes. Maybe you want to carry bikes, kayaks, or camping gear. Roof racks help you use your RAV4 to the fullest. But installing roof racks can feel tricky, especially if you have never done it before. The good news is, you can do it yourself with the right steps, tools, and safety tips. This guide will show you exactly how to install roof racks on a Toyota RAV4, from understanding roof rack types to finishing the job with confidence.
Why Install Roof Racks On Your Toyota Rav4?
The RAV4 is a popular SUV for both city driving and outdoor trips. But even with its roomy interior, you might need extra storage. Roof racks give you space for things that do not fit inside, like snowboards or a cargo box. They also keep your car’s interior cleaner and safer. When you install roof racks, you make your RAV4 more flexible for every adventure.
Adding roof racks can:
- Let you carry large or dirty items outside the cabin.
- Free up room for passengers and pets.
- Allow you to transport sports gear easily.
- Make long road trips more comfortable.
For many RAV4 owners, roof racks are a must-have. But before you get started, it helps to know about the different types and what suits your needs best.
Types Of Roof Racks For Toyota Rav4
Not all roof racks are the same. Choosing the right one depends on your RAV4 model year, your needs, and your budget. Here are the most common types you’ll see for a RAV4:
1. Factory Crossbars
Many RAV4s come with factory-installed crossbars or rails. These are made by Toyota and fit perfectly, but they may not be the strongest or most flexible option. They are great for light loads like skis or small cargo boxes.
2. Aftermarket Crossbars
Aftermarket crossbars are designed by brands like Thule, Yakima, or Rhino-Rack. They often offer better load ratings and more accessories. You can choose from different shapes (aero, square, round) and materials (aluminum, steel).
3. Raised Roof Rails
Some RAV4 trims come with raised roof rails. These rails run front to back and sit above the roof, giving easy places to mount crossbars.
4. Flush Roof Rails
Newer RAV4s may have flush roof rails, which sit closer to the roof. These may require special fitting kits for crossbars.
5. Naked Roof (no Rails)
Base RAV4 models may have a naked roof, with no rails or mounting points. For these, you need a clip-on or door-jamb style rack, which attaches to the door frame.
Read More: Best Roof Rack Cross Bars for Toyota Rav4
Comparison Of Roof Rack Types
Here’s a quick side-by-side look at the main roof rack options for RAV4:
| Type | Load Capacity | Ease of Installation | Appearance |
|---|---|---|---|
| Factory Crossbars | Light to Medium | Easy | OEM Look |
| Aftermarket Crossbars | Medium to Heavy | Moderate | Sporty/Custom |
| Raised Rails | Depends on Crossbars | Easy | Visible Rails |
| Flush Rails | Depends on Crossbars | Moderate | Sleek |
| Naked Roof | Light to Medium | Challenging | Temporary/Removable |
What You Need Before You Start
Installing roof racks is easier if you prepare well. Here’s what you’ll need:
- The right roof rack kit (crossbars, towers, fit kit if required)
- A measuring tape
- A torque wrench or regular wrench (as recommended)
- A screwdriver (sometimes needed)
- Step ladder (for easier roof access)
- Clean microfiber cloth
- The installation manual for your rack
Check your RAV4’s manual to know its roof load limit. Most RAV4s can handle about 165 pounds (75 kg) on the roof, including the weight of the rack itself.
Pro tip: Always check that your chosen rack is compatible with your exact RAV4 year and trim.
Step-by-step Guide: How To Install Roof Racks On Toyota Rav4
Let’s break down the process so you can do it safely and correctly. The steps may vary slightly depending on your RAV4’s roof type.
Step 1: Identify Your Roof Type
Look at your RAV4’s roof to see if you have:
- Factory rails (raised or flush)
- Naked roof (no rails at all)
If you have rails, you’ll usually need just crossbars and towers. If you have a naked roof, you’ll need a special kit that clamps into the door frame.
Step 2: Read The Instructions
Every roof rack brand is a little different. Take time to read the manual that comes with your kit. Look for any warnings or special steps for your RAV4 model.
Non-obvious tip: Watch a video for your exact rack and car model, if possible. Some brands post these on YouTube or their official sites.
Step 3: Prepare The Roof
Wash and dry the roof area where the racks will sit. Dirt or grit can scratch your paint or weaken the grip of the rack. Use a microfiber cloth to avoid marks.
If you have rails, check for any damage or loose parts before mounting.
Step 4: Assemble The Crossbars
Most racks come unassembled. Lay out all the parts. Attach the towers or feet to the crossbars as the instructions show. Don’t fully tighten the bolts yet—you may need to adjust later.
Step 5: Position The Roof Racks
Place the crossbars on the roof. For rails, attach them to the built-in mounting points. For naked roofs, line up the clamps with the door frames.
Important: Space the bars at the right distance for your gear. Most cargo boxes and bike racks need about 27 to 30 inches (68-76 cm) between bars.
Step 6: Attach And Secure
- For raised rails, the towers clamp around the rail. Tighten the bolts until snug.
- For flush rails, use the special mounting kit to lock the feet in place.
- For naked roofs, open the doors and hook the clamp under the door frame. Tighten evenly on each side.
Check that the bars are centered and parallel. Tighten all bolts to the torque setting listed in your instructions (often 5-7 Nm, but check your manual).
Step 7: Check For Movement
Once everything is tight, grab each crossbar and shake it gently. There should be no wobble or sliding. If anything feels loose, re-check your bolts and placements.
Step 8: Install End Caps And Accessories
Most racks have end caps for the bars. Install these now. If you’re adding a cargo box, bike tray, or kayak mount, follow the accessory instructions.
Step 9: Test And Final Inspection
Before driving, double-check every bolt and clamp. Give the bars a final shake test. Open and close your doors (for naked roof racks) to ensure nothing blocks them.
Take a short drive and listen for wind noise or rattling. Stop and re-check everything after your first trip.
Advanced tip: Re-tighten all bolts after a week of use. The rack can settle slightly during first use.
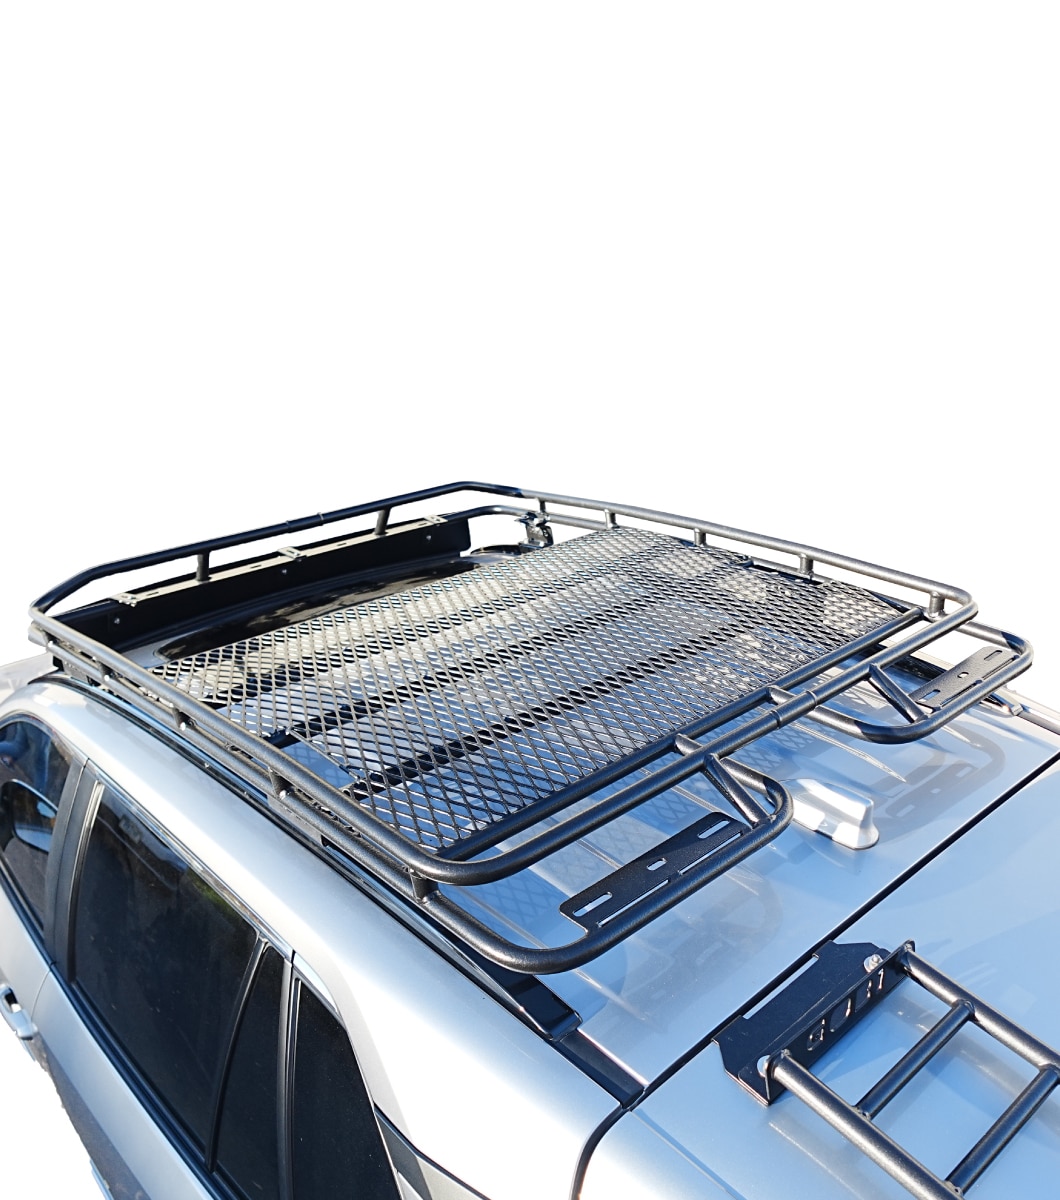
Credit: gobiracks.com
Special Tips For Different Rav4 Models And Years
Toyota RAV4s have changed over time. Here are some model-specific insights:
2013–2018 Rav4
These models often have raised rails. Installation is usually simple with clamp-style crossbars. The rails are strong, but check for rust if your car is older.
2019–present Rav4
Many new models have flush rails, which look sleek but need special fit kits. Measure carefully and use the right adapter for your year.
Rav4 Hybrid And Prime
Roof load limits may be lower for hybrid models due to battery weight. Always check your owner’s manual.
Rav4 Base Or Le Trim
Lower trims may have naked roofs. You’ll need door-jamb style racks, which are less permanent. Be careful not to over-tighten and dent your door frame.
Choosing The Right Roof Rack For Your Needs
With so many options, how do you pick the best rack for your RAV4? Here’s what matters most:
- Weight capacity: Will you carry bikes, kayaks, or just a cargo box? Check the rack’s and your RAV4’s limits.
- Ease of installation: Some racks are tool-free, while others need more work.
- Aerodynamics: Sleeker, oval-shaped bars are quieter and cause less drag.
- Locking features: Some racks have locks to protect your gear from theft.
- Compatibility with accessories: Make sure you can add bike racks, cargo boxes, etc.
Roof Rack Comparison For Rav4
Here’s a quick comparison of three top-rated roof racks for the RAV4:
| Brand | Type | Load Limit | Lock Included | Price Range (USD) |
|---|---|---|---|---|
| Thule WingBar Evo | Aftermarket Crossbar | 165 lbs | Yes | $300–$400 |
| Yakima JetStream | Aftermarket Crossbar | 165 lbs | No (add-on) | $250–$350 |
| OEM Toyota Crossbars | Factory Crossbar | 100 lbs | No | $180–$250 |
Non-obvious insight: OEM racks may look like a good deal, but aftermarket racks often have higher weight limits and more accessory options.
Common Mistakes To Avoid
Even careful DIYers make mistakes with roof rack installation. Here are some to watch out for:
- Ignoring weight limits: Overloading your roof can damage the rack or your car.
- Not tightening bolts enough: Loose racks can fly off at high speeds.
- Blocking the sunroof: Some racks can stop your sunroof from opening.
- Forgetting about height: After installation, your car is taller—watch for low garages.
- Using the wrong fit kit: Each RAV4 year and roof type may need a different kit.
- Skipping regular checks: Vibration can loosen bolts over time. Check them often.
Safety And Legal Considerations
A roof rack is only useful if it’s safe. Here’s how to stay legal and safe on the road:
- Never exceed the roof weight limit (usually 165 lbs/75 kg for RAV4s).
- Load heavy items in the center for balance.
- Use tie-down straps for all items, even cargo boxes.
- Check local laws: Some places have rules about overhanging loads or maximum vehicle height.
- Remove the rack if not in use for long periods to save fuel and reduce noise.
Expert tip: After heavy rain or a car wash, check for water leaks around the door seals if you have a clamp-on rack.
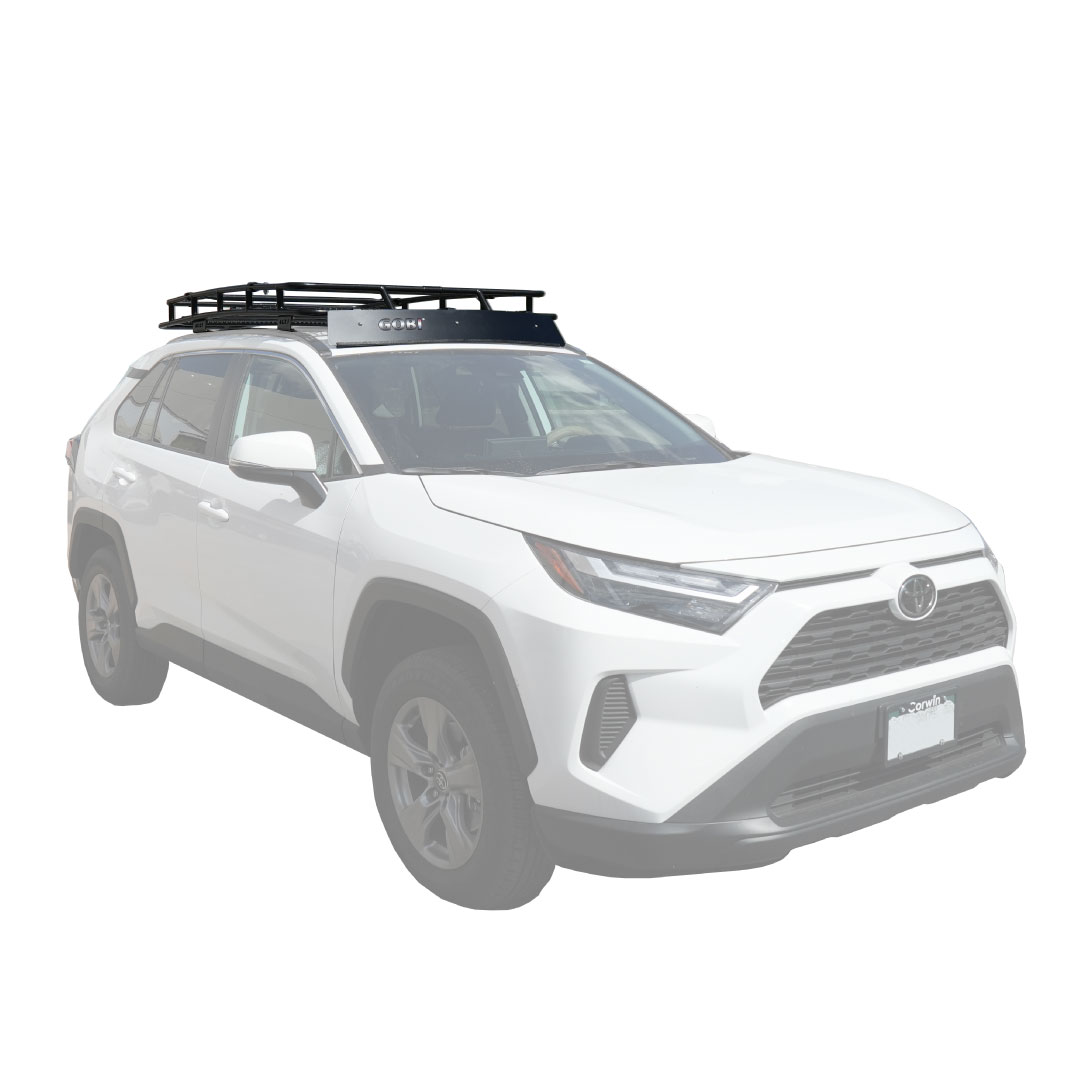
Credit: gobiracks.com
Maintenance And Care For Your Roof Rack
A well-installed roof rack can last for years if you take care of it. Here’s how:
- Wash the rack and roof regularly to remove salt or dirt.
- Lubricate moving parts with silicone spray.
- Inspect for rust, especially on steel parts.
- Tighten bolts every few months, especially after long trips or carrying heavy loads.
- Store removable racks in a dry place when not in use.
Advanced tip: If you notice wind noise, consider an aero fairing (a small wing in front of the rack) to reduce sound and improve fuel efficiency.
Using Your Roof Rack: Practical Tips
Once your rack is installed, here’s how to get the most from it:
- Use soft pads under metal gear to avoid scratches.
- Keep the heaviest items in the center, and lighter gear on the sides.
- Don’t block your rear hatch opening.
- Use locking straps for valuable items.
- Remove snow or ice from the rack before loading.
If you plan to transport bikes or kayaks often, look for specialized mounts that attach to your crossbars.
Upgrading And Removing Roof Racks
Sometimes you want to upgrade or remove your rack. Here’s how:
- To remove: Loosen all bolts and clamps carefully. Clean the roof after removal.
- To upgrade: Check if your new crossbars fit the same towers/feet. If not, buy a full kit.
- For resale: Many racks can be resold if kept in good condition.
Insider tip: If you lease your RAV4, use removable racks to avoid damage fees when returning the car.
Environmental Impact And Fuel Economy
Adding a roof rack can change your car’s fuel use and carbon footprint. Studies show that even an empty rack can reduce fuel efficiency by 5-15% due to extra drag. A cargo box can lower mileage even more.
To reduce impact:
- Remove the rack when you don’t need it.
- Choose aero-style bars for less wind resistance.
- Drive a little slower with a loaded rack.
For more data, see this external resource: Consumer Reports.
Table Of Roof Rack Weight Limits By Rav4 Year
Here’s a quick reference for recent RAV4 models and their typical roof weight limits:
| Model Year | Roof Type | Weight Limit (lbs) | Notes |
|---|---|---|---|
| 2013–2018 | Raised Rails | 165 | Strong rails, easy install |
| 2019–2024 | Flush Rails | 165 | Needs special kit |
| 2019–2024 Hybrid/Prime | Flush Rails | 100–130 | Check manual for hybrid |
| 2013–2024 Base/LE | Naked Roof | 100–130 | Clip-on style, lower limit |
Installing roof racks on your Toyota RAV4 is a smart upgrade that opens new possibilities for travel and adventure. By choosing the right rack, following careful steps, and checking your work, you’ll enjoy safe, secure cargo space for years to come.
Always follow your RAV4’s manual and rack instructions, and take a moment to double-check everything before you hit the road. With a little time and care, your next journey will be smoother, safer, and more fun.
FAQs Of How to Install Roof Racks on Toyota Rav4
How Much Weight Can I Safely Carry On My Rav4 Roof Rack?
Most Toyota RAV4s can handle up to 165 lbs (75 kg) on the roof, including the rack weight. Hybrid and base models may have lower limits. Always check your owner’s manual for the exact number and never exceed it.
Will Installing A Roof Rack Damage My Rav4’s Paint Or Roof?
If you install the rack correctly and keep the contact points clean, your paint should stay safe. Using a microfiber cloth to clean the roof and checking for dirt before installation helps avoid scratches. Avoid over-tightening clamps, especially on naked roofs.
Can I Open My Sunroof With The Roof Rack Installed?
It depends on your rack and accessory setup. Many crossbars sit above the sunroof and do not block it, but some may limit how much you can open it. Test the sunroof after installation, but never operate it with gear loaded above.
Are Roof Racks Noisy Or Do They Affect Fuel Economy?
Yes, roof racks can cause extra wind noise and lower fuel economy, especially at highway speeds. Using aerodynamic crossbars and removing the rack when not needed can help reduce these effects.
Do I Need Special Tools To Install A Roof Rack On My Rav4?
Most racks need only simple tools, like a wrench or a screwdriver. Some brands include all needed tools in the box. Using a torque wrench is helpful to get the perfect tightness, but it is not always required.
Disclosure: As an Amazon Associate, I may earn from qualifying purchases at no extra cost to you. Amazon and the Amazon logo are trademarks of Amazon.com, Inc, or its affiliates.
- Amazon, Amazon Prime, the Amazon logo and Amazon Prime logo are trademarks of Amazon. com, Inc. or its affiliates.

I am Sadman, the founder of CarSensorHub.com, where I share my passion for cars and technology. I specialize in writing detailed reviews and helpful guides on car gadgets, accessories, safety tools and many more. My mission is to help car owners discover the best products and tips to improve their driving experience and stay safe on the road.