Is your oil pressure warning light flickering or staying on? It could be a sign that your oil pressure sensor wiring harness is faulty.
Ignoring this issue might lead to serious engine problems and costly repairs. But don’t worry—you don’t have to be a mechanic to fix it. You’ll learn simple, step-by-step ways to diagnose and repair your oil pressure sensor wiring harness quickly and safely.
Keep reading to protect your engine and save money by handling this common problem yourself.
Signs Of A Faulty Oil Pressure Sensor Wiring
Signs of a faulty oil pressure sensor wiring can show up in several ways. These signs help identify wiring problems early. Detecting issues quickly can prevent bigger engine troubles. Watch for changes in warning lights, engine performance, and gauge readings. Understanding these signs helps you know when to check the wiring harness.
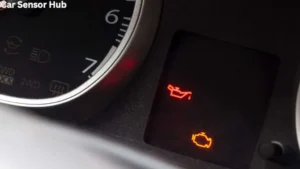
Warning Lights And Error Codes
The oil pressure warning light may turn on suddenly. This light signals a possible problem with the sensor or wiring. Sometimes the light blinks or stays on without reason. Your car’s computer may store error codes related to oil pressure. These codes can help pinpoint wiring faults. A scan tool reveals these error codes for easy diagnosis.
Engine Performance Issues
Faulty wiring can cause the engine to run poorly. You might notice rough idling or stalling. The engine may hesitate during acceleration. Sometimes the car loses power unexpectedly. These problems occur because the sensor sends wrong signals. The engine control unit reacts to false oil pressure data.
Oil Pressure Gauge Fluctuations
The oil pressure gauge may jump up and down erratically. It can show low pressure when the engine is fine. Sometimes the gauge reads high without cause. These fluctuations mean the wiring is not sending stable signals. A steady oil pressure reading is crucial for engine health. Unstable readings warn of wiring or sensor damage.

Credit: www.youtube.com
Tools And Materials Needed
Fixing an oil pressure sensor wiring harness requires the right tools and materials. These help you work safely and correctly. Having everything ready saves time and avoids mistakes. This section covers the basic tools, electrical testing equipment, and replacement parts needed.
Basic Hand Tools
Start with simple hand tools. A set of screwdrivers with different heads is essential. You will need pliers for gripping wires and connectors. Wire cutters help to trim damaged wires. A wrench or socket set may be needed to remove sensor bolts. Keep a flashlight handy to see in tight spaces.
Electrical Testing Equipment
Testing tools check the wiring for faults. A multimeter measures voltage, resistance, and continuity. This tool helps find broken wires or shorts. A test light can also detect power in the circuit. Electrical tape and wire strippers are useful for safe repairs.
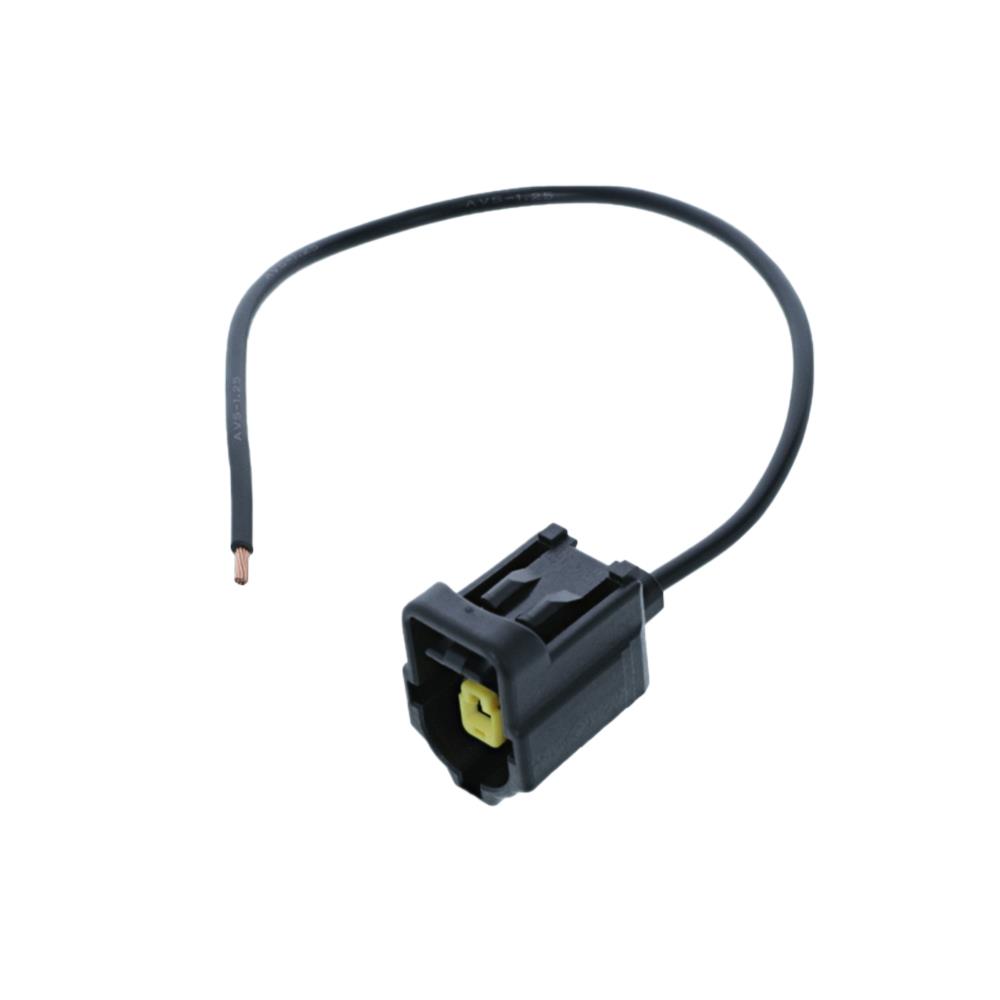
Replacement Parts And Connectors
Use quality replacement parts to ensure a good fix. Get a new wiring harness or sensor if needed. Match connectors carefully to avoid loose connections. Heat shrink tubing protects wires from moisture and damage. Keep spare fuses ready in case of electrical issues.
Locating The Oil Pressure Sensor And Wiring Harness
Finding the oil pressure sensor and its wiring harness is the first step to fixing any issues. These parts are crucial for your engine’s health. Knowing their exact location saves time and avoids confusion. This section helps you locate the sensor and the wiring harness easily.
Sensor Position In Common Engines
The oil pressure sensor is usually near the engine block. Most engines place it close to the oil filter or oil pan. In some cars, it sits on the cylinder head. It looks like a small plug with a wire connector. Check the engine manual to find the precise spot for your model.
Tracing The Wiring Harness
The wiring harness connects the sensor to the dashboard gauge or computer. Follow the wire from the sensor carefully. It usually runs along the engine bay, secured by clips. Inspect the entire length for damage or loose connections. Clean connectors help maintain good contact and signal flow.
Inspecting The Wiring Harness For Damage
Inspecting the wiring harness for damage is a key step in fixing oil pressure sensor problems. The wiring harness connects the sensor to the vehicle’s electrical system. If the harness has damage, it can cause wrong signals or no signal at all. Careful inspection helps find issues like corrosion, broken wires, or poor connections. This saves time and prevents further problems.
Checking For Corrosion And Wear
Corrosion often appears as green or white buildup on metal connectors. It blocks electrical flow and causes sensor errors. Look closely at all connectors and terminals. Clean any corrosion with a wire brush or contact cleaner. Also, check for worn areas where the protective coating is missing. These spots can let moisture in, causing more corrosion.
Identifying Broken Or Frayed Wires
Broken or frayed wires cannot carry signals properly. Look along the harness for cuts, splits, or exposed wires. Use a flashlight to see inside tight spaces. Gently move wires to find hidden breaks. Replace or repair damaged sections using electrical tape or heat-shrink tubing. Good wire condition ensures accurate sensor readings.
Testing Electrical Continuity
Use a multimeter to test continuity in the wiring harness. Set it to the continuity or ohm setting. Touch the probes to each end of the wire. A beep or low resistance means the wire is good. No beep or infinite resistance shows a break. Test all wires connected to the sensor. This step confirms the wiring is intact and working.
Step-by-step Repair Process
Fixing an oil pressure sensor wiring harness involves several clear steps. Following the right order ensures safety and effectiveness. This guide breaks down each task simply.
Disconnecting The Battery
Start by disconnecting the battery. This prevents electric shocks and short circuits. Use a wrench to remove the negative cable first. Secure the cable away from the terminal. Never skip this step for safety.
Removing The Faulty Sensor
Locate the oil pressure sensor on your engine. Use a socket wrench to loosen and remove the sensor carefully. Check the sensor for damage. Keep track of any screws or bolts removed. Avoid dropping parts into the engine bay.
Repairing Or Replacing Wiring
Inspect the wiring harness connected to the sensor. Look for breaks, corrosion, or loose connections. Cut out damaged sections and strip the wire ends. Use wire connectors or solder to join wires properly. Wrap connections with electrical tape or heat shrink tubing. Replace the entire harness if damage is severe.
Reinstalling The Sensor
Place the repaired or new sensor back into its position. Tighten it securely with the socket wrench. Reconnect the wiring harness carefully. Double-check all connections for firmness. Finally, reconnect the battery to restore power.
Credit: lmr.com
Testing The Repair
Testing the repair of your oil pressure sensor wiring harness is an important step. It confirms if the fix works correctly. Careful testing helps avoid future issues with your vehicle’s engine. Follow these simple steps to ensure everything runs smoothly.
Restoring Power And Checking Connections
Start by turning the ignition to the ON position. This restores power to the sensor system. Check all wiring connections carefully. Make sure no wires are loose or damaged. Tighten any loose connections. Look for signs of corrosion or dirt on connectors. Clean them if necessary. Secure all parts firmly in place before moving on.
Monitoring Oil Pressure Readings
Use a diagnostic tool or your vehicle’s gauge to watch oil pressure. The readings should be steady and within the normal range. Sudden drops or spikes may indicate a problem. Drive the car for a few minutes and watch the readings closely. Consistent numbers show the repair is successful. If readings are unstable, check the wiring and sensor again.
Clearing Error Codes
Turn on your diagnostic scanner to check for error codes. Clear any stored codes related to oil pressure. Restart the vehicle and scan again. No new codes should appear if the repair is good. This confirms the sensor and wiring are working properly. Repeat this step after a test drive to be sure.
Preventive Maintenance Tips
Preventive maintenance helps keep the oil pressure sensor wiring harness in good shape. It stops damage before it starts. This saves time and money on repairs. Simple steps can extend the life of the wiring harness and avoid sensor issues.
Check wiring often. Protect it from harsh conditions. Use helpful products to keep connections clean and safe. These tips help your vehicle run smoothly.
Regular Inspection Of Wiring Harness
Look at the wiring harness every few months. Check for cracks, frays, or loose connections. Small problems can turn into big ones fast. Catching issues early prevents sensor failure. Use a flashlight to see hidden spots. Make sure wires are tight and not rubbing on metal parts.
Protecting Wiring From Heat And Moisture
Heat and moisture harm wiring over time. Keep wires away from hot engine parts. Use heat shields or wraps to protect wires. Moisture causes corrosion and shorts. Seal connectors with waterproof covers. Park in a garage or covered area to reduce exposure. Keeping wiring dry and cool helps it last longer.
Using Dielectric Grease
Dielectric grease stops moisture and dirt from entering connectors. Apply a small amount to sensor plugs and terminals. This grease keeps electrical contacts clean and prevents corrosion. It also makes it easier to disconnect wires later. Using dielectric grease is a simple way to protect your wiring harness.

Credit: ucr.yuja.com
Frequently Asked Questions
How Do I Identify A Faulty Oil Pressure Sensor Wiring Harness?
A faulty wiring harness shows damaged insulation, corrosion, or loose connections. You may notice erratic gauge readings or warning lights. Inspect the harness visually and test continuity with a multimeter to confirm faults.
What Tools Are Needed To Fix Oil Pressure Sensor Wiring?
You need a multimeter, wire strippers, crimp connectors, electrical tape, and a replacement harness or wires. These tools help diagnose and repair broken or corroded wiring effectively and safely.
Can I Fix Oil Pressure Sensor Wiring Harness Myself?
Yes, if you have basic electrical skills and proper tools. Follow safety precautions, disconnect the battery, and carefully repair or replace damaged wires. If unsure, consult a professional mechanic.
How Long Does It Take To Repair The Wiring Harness?
Repair time varies but typically takes 30 to 60 minutes. It depends on the extent of damage and your experience with wiring repairs.
Conclusion
Fixing the oil pressure sensor wiring harness can save you time and money. Check the wires carefully for breaks or damage. Replace any faulty parts to ensure accurate sensor readings. Keep connections clean and secure to avoid future problems. Regular checks help keep your engine running smoothly.
Taking these simple steps improves your vehicle’s performance and safety. Stay patient and work carefully for the best results. Your car will thank you with better reliability and peace of mind.
Disclosure: As an Amazon Associate, I may earn from qualifying purchases at no extra cost to you. Amazon and the Amazon logo are trademarks of Amazon.com, Inc, or its affiliates.
- Amazon, Amazon Prime, the Amazon logo and Amazon Prime logo are trademarks of Amazon. com, Inc. or its affiliates.

I am Sadman, the founder of CarSensorHub.com, where I share my passion for cars and technology. I specialize in writing detailed reviews and helpful guides on car gadgets, accessories, safety tools and many more. My mission is to help car owners discover the best products and tips to improve their driving experience and stay safe on the road.