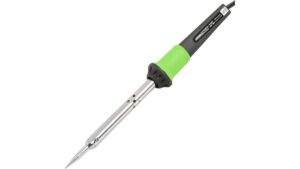
Soldering in automotive work needs a tip that moves heat fast: an 8–10 mm chisel or screwdriver tip, in good condition, on an iron of 60–80 watts. That wide flat face touches more of a thick wire or terminal at once, so the joint heats in seconds, not minutes. A fine pointed tip can’t push enough heat into automotive wire, and the joint ends up cold. Match the tip to the job, keep it clean and tinned, and you’ll get strong joints on cars, trucks and trailers.
The one thing that decides success is heat delivery, not solder brand. Automotive wire is thick copper, and terminals sit on big metal parts that pull heat away fast. A tip only works if it can dump heat into that metal quicker than the metal drains it away. Too small a tip means the solder melts on the tip but never flows into the wire.
The most common mistake happens before you start: reaching for the fine tip you use on circuit boards. That tip is made for tiny pads, not 12-gauge wire. Grab a wide chisel instead, and check your iron’s wattage. If you’re not sure your iron is hot enough for the wire you have, check the iron maker’s own spec sheet before you cut or strip anything.
Steps for a clean automotive solder joint
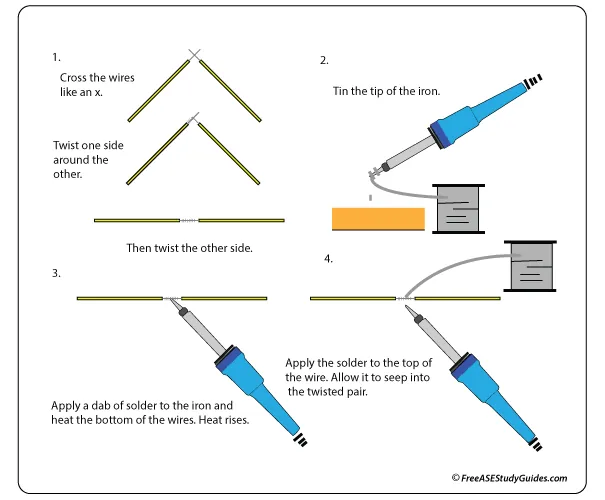
- Strip 6–10 mm of insulation from the wire with stripping pliers. Don’t nick the copper strands — a cut strand weakens the joint and it can snap later under vibration.
- Set the iron to 350–400 °C (about 660–750 °F) if it’s adjustable. Below that, heat moves too slowly into thick wire; much higher and you burn the flux and the insulation.
-
Tin the tip first. Melt a thin coat of solder over the whole working face, then wipe it on a damp sponge or brass wool. A dry, black tip won’t transfer heat, no matter the wattage. Tip: If the tip won’t take solder after wiping, it’s oxidized. Clean it with tip tinner or replace it — don’t keep pushing a dead tip into the joint.
-
Heat the joint, then feed solder into it — not onto the iron. Touch the flat face to the wire or terminal for 2–4 seconds, then feed solder where the metal meets the tip. It should flow and look shiny.
- Hold the tip still for 1–2 seconds after the solder flows, then pull the iron straight away. Don’t drag it — a moving tip makes a rough, grainy joint.
- Let the joint cool untouched for about 5 seconds. Blowing on it or wiggling the wire while it sets gives you a cold joint that looks fine but fails later. Tip: For heavy battery cables or ground straps, a 60–80 W iron may still be too slow. Those joints often need a torch or a crimped connector instead — that’s a job for a shop with the right tool, not a hand iron.
If your work involves mains voltage, airbag wiring or fuel-system electrics, stop and hand it to a qualified auto electrician. Those circuits carry real risk of injury or an airbag firing, and a home repair isn’t worth it.
How long automotive soldering takes
A single joint on 18–22 gauge wire takes about 10–20 seconds start to finish. Thicker wire and big terminals take longer, because the metal soaks up heat before the solder will flow. The table below assumes a 60–80 W iron with an 8–10 mm chisel tip, already hot and tinned.
| Situation | How long | What changes it | What to watch for |
|---|---|---|---|
| Thin wire, 18–22 AWG | 10–20 seconds | Tip size, how clean the copper is | Solder flows too fast and floods the joint |
| Medium wire, 14–16 AWG | 20–40 seconds | Iron wattage, wire length | Insulation starts to soften near the joint |
| Thick wire, 10–12 AWG | 40–90 seconds | Wattage, how much metal is nearby | Heat wicks down the wire, melting insulation further along |
| Terminal bolted to chassis | 1–3 minutes | Size of the metal it’s attached to | The whole bracket heats up and pulls heat away |
| Corroded or greasy wire | Add 30–60 seconds | How well you cleaned it | Solder beads up instead of flowing |
If a joint is taking far longer than the table says, stop. The tip is probably too small or too oxidized for the job, and more time just cooks the wire. Switch to a bigger tip or a higher-wattage iron.
Signs the joint is actually good
A finished joint should look shiny and smooth, like a small silver fillet where the wire meets the terminal. Dull, grainy or blobby solder means the metal never got hot enough, and that’s a cold joint. Run your fingernail along it — a good joint is solid, with no crack or movement where the wire enters the solder.
The one test that settles it when things look borderline: give the wire a gentle tug. A sound joint holds firm; a cold one cracks or pulls free. For anything safety-related — brakes, lights, fuel pump wiring — the standard to check against is the one your vehicle maker publishes in its service manual, and for wire and connector specs, SAE International publishes the automotive wiring standards shops follow.
You can also watch the solder as it cools. If it stays shiny for the first second and sets smooth, you got enough heat. If it goes grainy right away, reheat it and add a touch of fresh solder with flux inside.
Mistakes that spoil an automotive solder joint
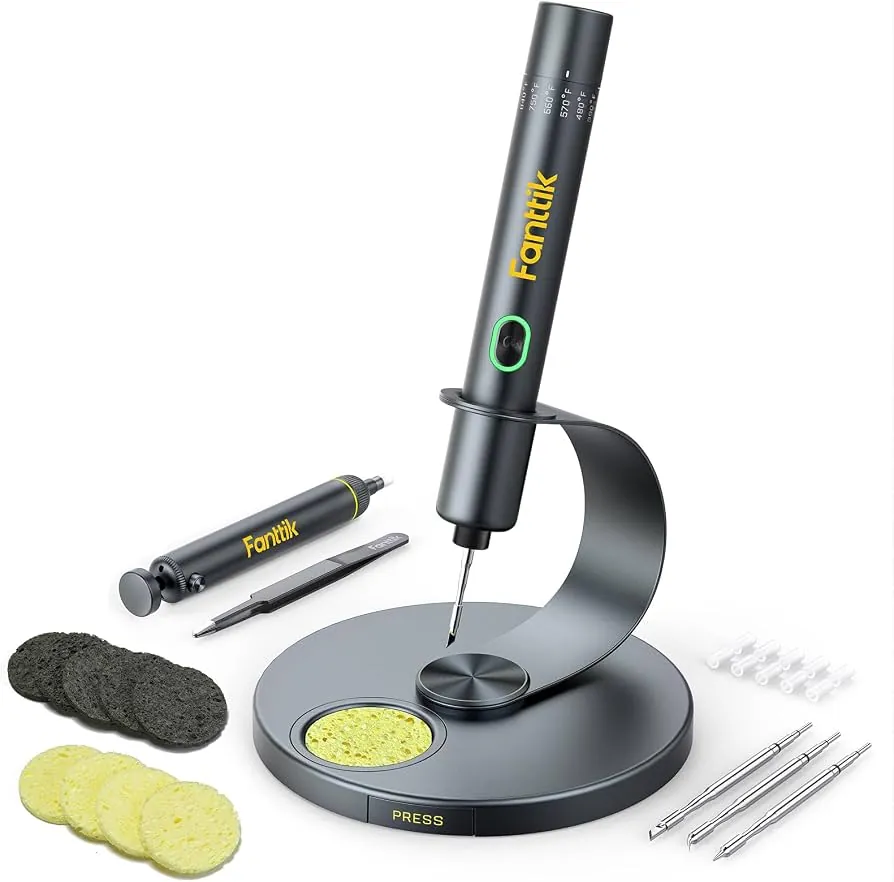
- Using a fine pointed tip on thick wire. The tip can’t move enough heat, so the solder sits on top and never wets the copper. Use a wide chisel tip sized to the wire instead.
- Heating the solder instead of the joint. Solder melted on the iron and dripped onto cold metal makes a weak, lumpy blob. Heat the wire and terminal first, then feed solder into them.
- Skipping the cleaning step. Grease, road grime and oxidation stop solder from bonding, so the joint looks joined but isn’t. Wipe the copper with isopropyl alcohol and scuff it with fine abrasive before soldering.
- Moving the wire while it cools. A joint that shifts in the first few seconds sets grainy and cracks under vibration. Hold it still for about 5 seconds and let it air-cool.
- Leaving the iron on too long. Extra seconds don’t make a better joint — they melt insulation and can damage nearby plastic or a circuit board. If it’s not flowing in the time the table gives, fix the tip or the wattage, not the clock.
Related guides
- How to Diagnose Oil Pressure Sensor Wiring: Expert Tips
- Ram 1500 Rebel DIY Light Bar Wiring Kit | Best Deals Guide
- Best Car Window Tint Kits – Perfect DIY Automotive Tinting
FAQs Of What Is The Best Tp For Soldering in Automotive
What size soldering tip is best for automotive wire?
An 8–10 mm chisel or screwdriver tip covers most automotive work, from 22-gauge signal wire up to 10-gauge power wire. For very thick battery cables, you’d need a much larger tip or a different tool. Match the flat face to the wire thickness — wider wire needs a wider tip.
How many watts should a soldering iron be for car wiring?
Aim for 60–80 watts for most automotive wiring. That range heats 14–18 gauge wire in seconds without overheating it. For 10–12 gauge wire or terminals bolted to the chassis, you’ll want the top of that range or more. Below 40 watts, thick wire pulls heat away faster than the iron replaces it.
Can you solder car wires without removing them?
Yes, if there’s room to work and the wire isn’t near fuel, airbags or hot parts. Slide a heat-shrink tube on first, solder the joint, then shrink the tube over it. On live circuits, disconnect the battery ground first. On airbag or fuel-system wiring, don’t solder at all — leave it to a shop.
Is soldering better than crimping for car wiring?
Both work, and the right choice depends on the joint. Soldering gives a solid, low-resistance connection on fixed wiring inside the cabin. Crimping with a proper tool is faster and more reliable where vibration is heavy, like engine bays and trailer plugs. Many shops crimp and then seal with heat-shrink.
Why does my solder keep balling up instead of flowing?
The metal is either too cold or too dirty. Solder balls up on a surface it can’t wet, which usually means oxidation or grease on the copper, or a tip that isn’t transferring heat. Clean the wire, re-tin the tip, and hold the iron on the joint a couple of seconds longer before feeding solder.
How do I stop melting the insulation while soldering?
Use a wider tip and a shorter contact time, and clip a heat sink — a small metal clamp — on the wire a few centimeters from the joint. The heat sink pulls excess heat away before it reaches the plastic. If the insulation still softens, your iron is staying on too long.
What happens if I use the wrong tip?
A tip that’s too small leaves a cold joint that looks connected but carries high resistance. That can cause flickering lights, a dead circuit or a joint that fails under vibration. A tip that’s too large can burn insulation and nearby plastic. Match the tip to the wire and you avoid both.
Conclusion
Soldering in automotive work comes down to one habit: put the biggest flat tip that fits the wire on a hot, clean iron, heat the metal, then feed the solder in. Get that right and the joint is strong, quiet and permanent. Get the tip wrong and no amount of technique saves it.
Disclosure: As an Amazon Associate, I may earn from qualifying purchases at no extra cost to you. Amazon and the Amazon logo are trademarks of Amazon.com, Inc, or its affiliates.
- Amazon, Amazon Prime, the Amazon logo and Amazon Prime logo are trademarks of Amazon. com, Inc. or its affiliates.

I am Sadman, the founder of CarSensorHub.com, where I share my passion for cars and technology. I specialize in writing detailed reviews and helpful guides on car gadgets, accessories, safety tools and many more. My mission is to help car owners discover the best products and tips to improve their driving experience and stay safe on the road.