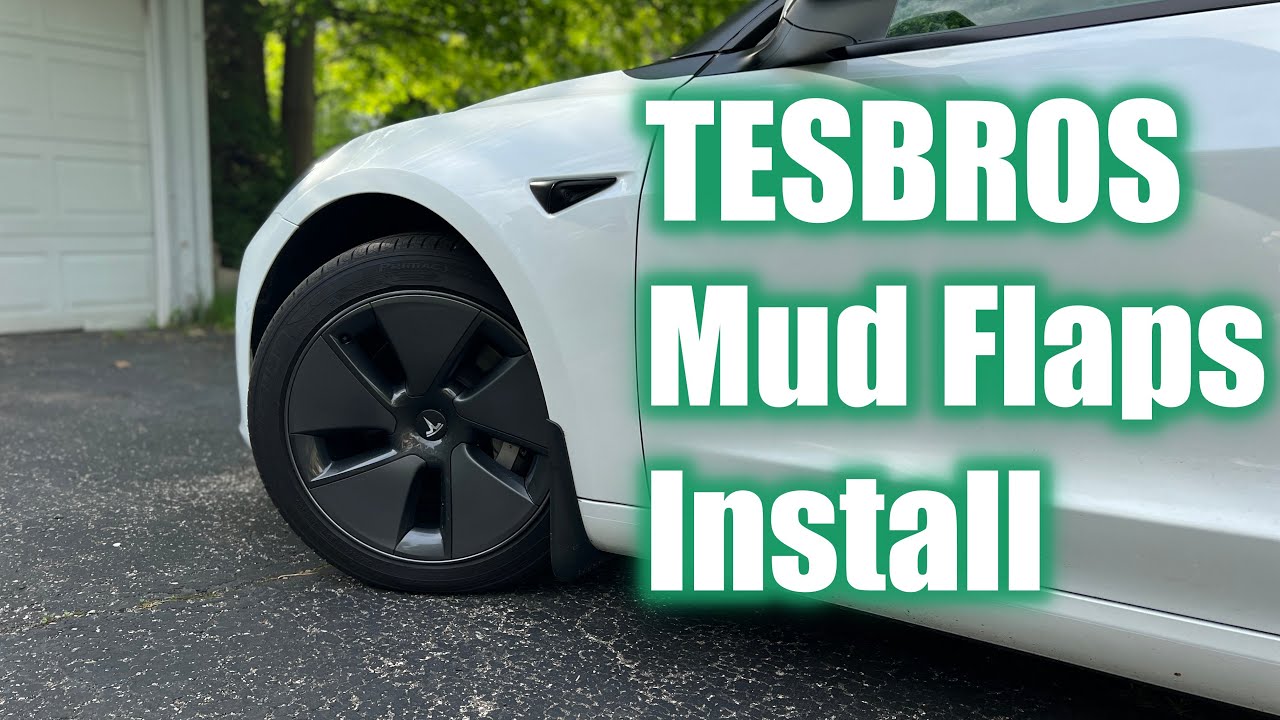
Guard your paint from costly rock chips and road grime with a quick DIY upgrade. Learning how to install mud flaps Tesla Model 3 preserves your exterior finish and prevents underbody corrosion. Enhance your car’s protection and style in under thirty minutes.
But how do you install mud flaps on your Tesla Model 3 without hassle or extra costs? In this guide, you’ll find clear, step-by-step instructions that anyone can follow. By the end, your car will be ready to handle any road conditions while staying clean and stylish.
Keep reading to learn exactly how to do it yourself.
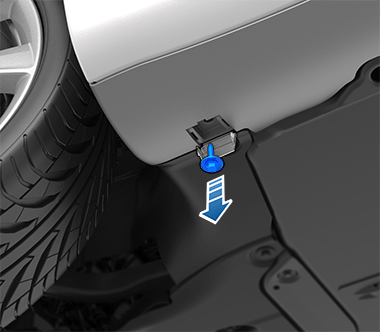
Credit: service.tesla.com
Tools And Materials Needed
Installing mud flaps on your Tesla Model 3 requires some basic tools and materials. Having the right items ready will make the process faster and easier. Preparing everything before you start helps avoid interruptions.
Most tools are common and easy to find. Some materials come with the mud flaps kit. Check the kit first to see what is included.
Basic Tools Needed
- Screwdriver (Phillips and flathead)
- Socket wrench set
- Trim removal tool or plastic pry tool
- Measuring tape or ruler
- Marker or pencil
- Drill with drill bits (if drilling is required)
Materials Required
- Mud flaps designed for Tesla Model 3
- Mounting screws and clips (usually included)
- Cleaning cloth or rag
- Rubbing alcohol or cleaner for surface prep
- Protective gloves (optional but recommended)
Additional Items To Have
- Jack and jack stands (for easier access)
- Flashlight or work light
- Protective eyewear
Preparing Your Tesla Model 3
Preparing your Tesla Model 3 before installing mud flaps is important. It helps the mud flaps fit well and last longer. Taking time to clean and lift your vehicle makes the job easier and safer.
Cleaning The Wheel Wells
Start by removing dirt and debris from the wheel wells. Use water and a brush to clean all corners. Dirt can stop mud flaps from sticking properly. Clean wheel wells help the mud flaps stay in place and look neat.
Lifting The Vehicle Safely
Lift your Tesla Model 3 carefully to access the wheel area. Use a jack and place it under the correct lifting points. Always use jack stands to support the car securely. Never rely on the jack alone. Safety is key to avoid accidents during installation.
Read More: How to Reset Tesla Model 3 Touchscreen
Choosing The Right Mud Flaps
Choosing the right mud flaps for your Tesla Model 3 is important. The right choice protects your car from dirt, rocks, and water. It also keeps your car looking clean and new. This section helps you understand what to consider before buying mud flaps.
Selecting mud flaps involves thinking about quality, fit, and style. Picking the right type saves time and money. It also makes installation easier and ensures long-lasting use.
This Article May Help You More: Best Mud Flaps for Tesla Model 3
OEM Vs Aftermarket Options
OEM mud flaps come from Tesla or its partners. They fit perfectly and match your car’s design. OEM options often cost more but offer guaranteed quality and warranty. Aftermarket mud flaps come from other companies. They may offer more styles and lower prices. Fit and quality can vary. Some aftermarket options are excellent. Others may need adjustments during installation.
Material And Design Considerations
Materials affect durability and performance of mud flaps. Rubber mud flaps are flexible and resist cracking. Plastic mud flaps are lightweight and easy to clean. Metal mud flaps offer strong protection but can be heavy. Design matters for both function and look. Wide mud flaps provide better coverage. Slim designs may suit a sleek car look better. Choose designs that block dirt without hitting tires or ground.
Removing Existing Components
Removing the old parts is the first step when installing mud flaps on your Tesla Model 3. This step makes space and prepares the car for new mud flaps. Careful removal helps avoid damage to the car’s body or wheel area.
Focus on removing wheel covers and any old mud flaps or clips. Each part needs gentle handling. Use the right tools to make the job easier and safer.
Taking Off Wheel Covers
Start by removing the wheel covers. These covers protect the wheel bolts and add style. Use a flat tool or your hands to pry them off gently. Work slowly to avoid breaking the clips holding the cover.
Place the wheel covers in a safe spot to avoid losing or damaging them. Removing these covers gives you clear access to the wheel area for mud flap installation.
Unfastening Old Mud Flaps Or Clips
Next, remove the old mud flaps or clips. Use a screwdriver or pliers to undo screws and clips. Keep track of all screws and fasteners for reuse or disposal.
Work carefully to prevent scratching the car’s paint. If clips are stuck, apply slight pressure or use a lubricant spray. Removing these parts clears the way for new mud flaps.
Installing The New Mud Flaps
Installing the new mud flaps on your Tesla Model 3 protects the car’s paint and body from dirt and debris. Proper installation ensures they stay secure and work well. Follow these steps carefully to fit them correctly.
Aligning The Mud Flaps
Start by holding the mud flap near the wheel well. Check the shape and match it with the contours of the car. Make sure the flap sits flat against the fender. Align the holes on the mud flap with the existing holes on the car. This step is important for a perfect fit and easy installation.
Securing With Screws And Clips
Use the screws and clips that come with the mud flaps. Insert screws into the aligned holes gently. Tighten each screw evenly to avoid bending the flap. Attach clips to hold the mud flap firmly in place. Double-check that the mud flaps do not move or rattle. This step keeps them stable during driving.
Final Adjustments And Checks
After attaching the mud flaps on your Tesla Model 3, final adjustments and checks are important. These steps ensure the flaps fit well and stay secure. Proper fit and tight fasteners prevent damage and noise while driving. Take your time to confirm everything is right before finishing the installation.
Ensuring Proper Fit And Clearance
Check the mud flaps for even spacing from the tires. Make sure they do not touch the wheels or suspension parts. Look for enough space to avoid rubbing during turns or bumps. Adjust the position by loosening the screws slightly. Move the flap until it sits straight and clear of moving parts. Double-check both front and rear flaps to keep balance.
Tightening All Fasteners
Secure all screws and bolts firmly. Use a screwdriver or wrench that fits well to avoid slipping. Tighten each fastener one by one, but do not over-tighten. Over-tightening can crack the mud flaps or strip the threads. After tightening, give the flap a gentle shake. Confirm it stays firmly in place without any wiggle. Repeat this process for every fastener on all mud flaps.
Maintenance Tips For Mud Flaps
Maintaining mud flaps on your Tesla Model 3 keeps them effective and lasting longer. Dirt and debris can build up quickly, causing wear and tear. Regular care helps avoid damage and keeps your vehicle looking neat.
Regular Cleaning
Clean mud flaps often to remove dirt and grime. Use mild soap and water for best results. Avoid harsh chemicals that can damage the material. A soft brush helps remove stuck-on mud. Rinse thoroughly to prevent residue buildup. Dry the mud flaps with a clean cloth after washing.
Inspecting For Damage
Check mud flaps for cracks, tears, or loose fittings regularly. Look closely after rough drives or bad weather. Tighten any loose screws or bolts right away. Replace damaged mud flaps to protect your car’s paint and body. Early inspection prevents bigger issues and costly repairs.
Read More: Best Protective Mud Flaps for Silverado 1500
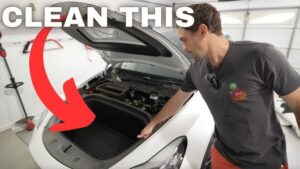
Credit: www.youtube.com
Conclusion
Installing mud flaps on your Tesla Model 3 protects the paint and body. It keeps dirt and debris from splashing onto the car. The process is simple with the right tools and steps. You save money by doing it yourself at home.
Enjoy cleaner, better-looking rides every time you drive. Keep your Tesla Model 3 looking fresh and new. Maintenance made easy and effective. Try it today and see the difference.
FAQs About How to Install Mud Flaps Tesla Model 3
What Tools Are Needed To Install Tesla Model 3 Mud Flaps?
You need a screwdriver, wrench, and mounting hardware. These tools help remove wheel liners and secure mud flaps properly. Having these ready makes installation smoother and faster.
How Long Does Tesla Model 3 Mud Flap Installation Take?
Installation typically takes 30 to 45 minutes. It depends on your experience and preparation. Following instructions carefully ensures a quick, hassle-free process.
Are Tesla Model 3 Mud Flaps Easy To Install?
Yes, Tesla Model 3 mud flaps are designed for easy installation. Most kits include step-by-step guides. Basic tools and patience are enough for a successful setup.
Can Mud Flaps Damage Tesla Model 3 Paint?
No, properly installed mud flaps do not harm your paint. They protect the car from dirt and debris. Ensure correct mounting to avoid scratches or pressure points.
Disclosure: As an Amazon Associate, I may earn from qualifying purchases at no extra cost to you. Amazon and the Amazon logo are trademarks of Amazon.com, Inc, or its affiliates.
- Amazon, Amazon Prime, the Amazon logo and Amazon Prime logo are trademarks of Amazon. com, Inc. or its affiliates.

I am Sadman, the founder of CarSensorHub.com, where I share my passion for cars and technology. I specialize in writing detailed reviews and helpful guides on car gadgets, accessories, safety tools and many more. My mission is to help car owners discover the best products and tips to improve their driving experience and stay safe on the road.