“Parking assist temporarily unavailable” means your car’s parking sensors, camera, or both cannot provide reliable readings right now. The usual causes are dirt, ice, snow, water, an obstruction, physical damage, or a temporary sensor communication error.
Clean the sensors and camera lens, remove anything blocking the bumper, inspect for damage, and power-cycle the vehicle. If the warning remains after those checks and a short drive, the vehicle likely needs a diagnostic scan for a failed sensor, wiring problem, mounting issue, or calibration fault. Until the system works again, rely on your mirrors and backup camera instead of proximity alerts, automatic braking, or parking guidance.
Key Takeaways
- Clean the sensors first. Dirt, ice, or mud on ultrasonic sensors or camera lenses can trigger a temporary shutdown.
- Remove interference. Certain covers, bike racks, and heavy bumper grime can block sensor returns.
- Check for visible damage. A bent bracket or cracked bumper cover can misalign sensors.
- Try a controlled reset. Power-cycling the car can clear a temporary fault, but it will not repair a failed sensor.
- Watch for repeat messages. If the warning returns every drive or will not clear after a day, get the vehicle scanned.
- Use normal safety checks. If the system is unavailable, slow down and use your mirrors and backup camera normally.
What “Parking Assist Temporarily Unavailable” Means
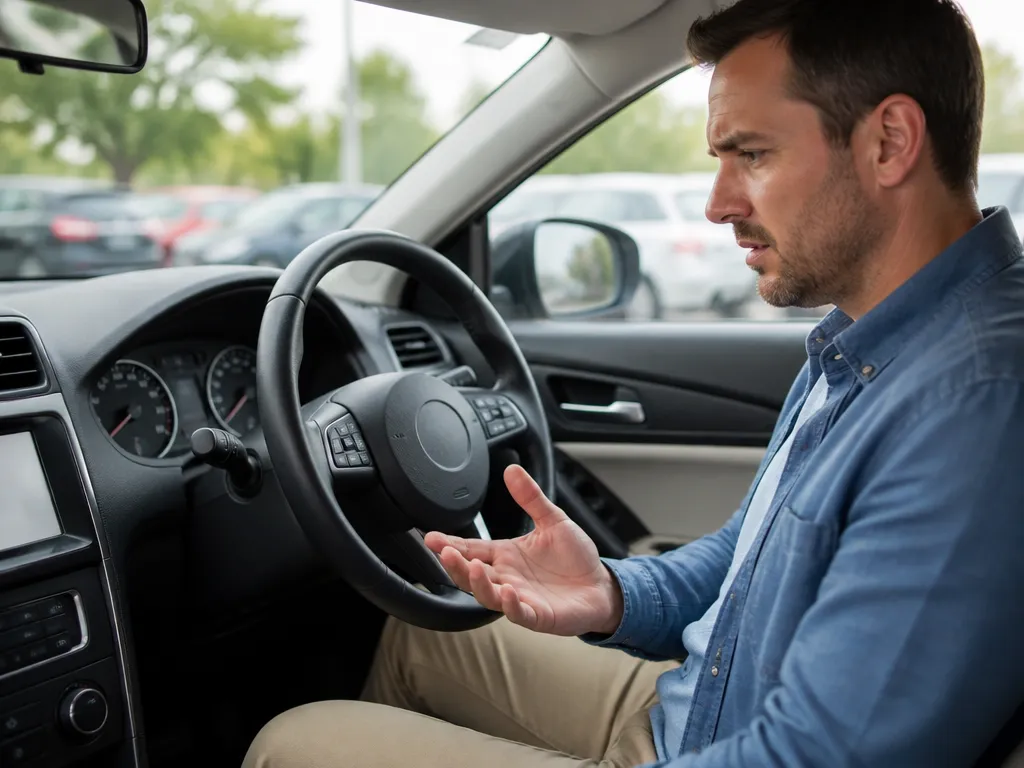
The warning often appears when the system cannot get stable sensor readings. Common triggers include mud on the sensors, snow or ice on the bumper, a dirty rear camera lens, or a sensor knocked out of position by a curb scrape or minor impact.
If the message appears after a wash, rainstorm, or snowy drive, contamination is the first thing to check. If it appears after hitting a curb, scraping a parking bollard, or replacing a bumper cover, suspect sensor alignment or physical damage. A warning that comes and goes randomly points more toward an intermittent electrical fault or sensor communication problem.
Many vehicles use several sensors across the front and rear bumpers. When even one sensor falls outside its expected range, the vehicle may disable the entire parking-assist function rather than provide incomplete or misleading information.
How to Interpret the Warning
The timing of the message provides useful clues:
- After rain, snow, mud, or a car wash: Moisture or contamination may be covering the sensors or camera.
- After a curb strike or parking-lot scrape: A sensor, bracket, wiring connector, or bumper cover may have moved.
- After bumper replacement: A sensor may be misaligned, incorrectly seated, or in need of recalibration.
- Only with a bike rack or tow accessory installed: The accessory may obstruct or confuse the sensors.
- At random intervals: An intermittent connector, wiring fault, or aging sensor is more likely.
- With other driver-assist warnings: The problem may involve a shared module, communication circuit, or calibration issue.
If the warning appears only while backing up, start with the rear sensors and rear camera. If it appears during several parking functions, inspect the full sensor system rather than focusing on one location.
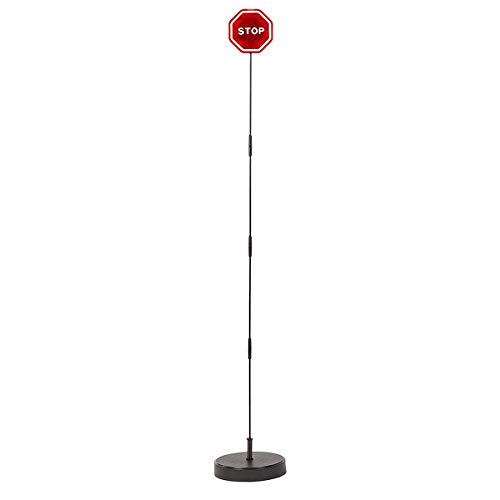
Helpful pick
CENTAURUS Garage Parking Assist Led Flashing Garage Parking Sensor Perfect Target Indicator Parking Flashlight System with Adjustable Height Guide LED Stop Sign Bumper Sensor, Red (1 Pack)
If your vehicle’s parking sensors are permanently damaged, this flashing LED garage stop sign offers a reliable, low-cost parking assistance solution.
The Fastest Checks for a Parking Assist Warning
Start with the simplest high-probability causes. Clean the sensor area thoroughly, remove anything attached to the bumper, and clear the camera lens if the vehicle uses camera-based parking guidance. Then test the system at low speed in a safe area.
A practical troubleshooting sequence is:
- Clean the sensors. Use water and a soft brush or microfiber cloth to remove mud, salt, ice residue, and road film from each sensor face.
- Clean the camera lens. Use a clean microfiber cloth and a lens-safe cleaner if needed. Avoid harsh solvents that can haze plastic.
- Remove obstructions. Check for protective covers, trailer-hitch equipment, tow bars, bike racks, bumper grime, or accessories installed near the sensors.
- Inspect the bumper. Look for cracks, dents, gaps, missing sensor caps, or a sensor that sits deeper or farther out than the others.
- Power-cycle the vehicle. Turn the car off, exit, and lock it for a short period before restarting. Some systems clear temporary out-of-range readings after a fresh boot.
- Test at low speed. Try the system in an open area with few obstacles, using your mirrors and camera as the primary safety checks.
A Quick Symptom
Ask yourself when and where the warning appears:
- Only when backing up? Rear sensors or the rear camera are the prime suspects.
- Only when parking in certain positions? Sensor occlusion or a change in bumper angle may be involved.
- Only at night or in rain? Reflections, lens contamination, or calibration sensitivity may be contributing.
- After construction roads or rough pavement? A connector may have loosened, or a sensor may have shifted.
- After an accessory installation? The accessory or its wiring may be interfering with the sensor field.
- Alongside “parking sensors unavailable” or “driver assist malfunction”? Treat the message as a stronger sign of an actual system fault.
What to Inspect Without Tools
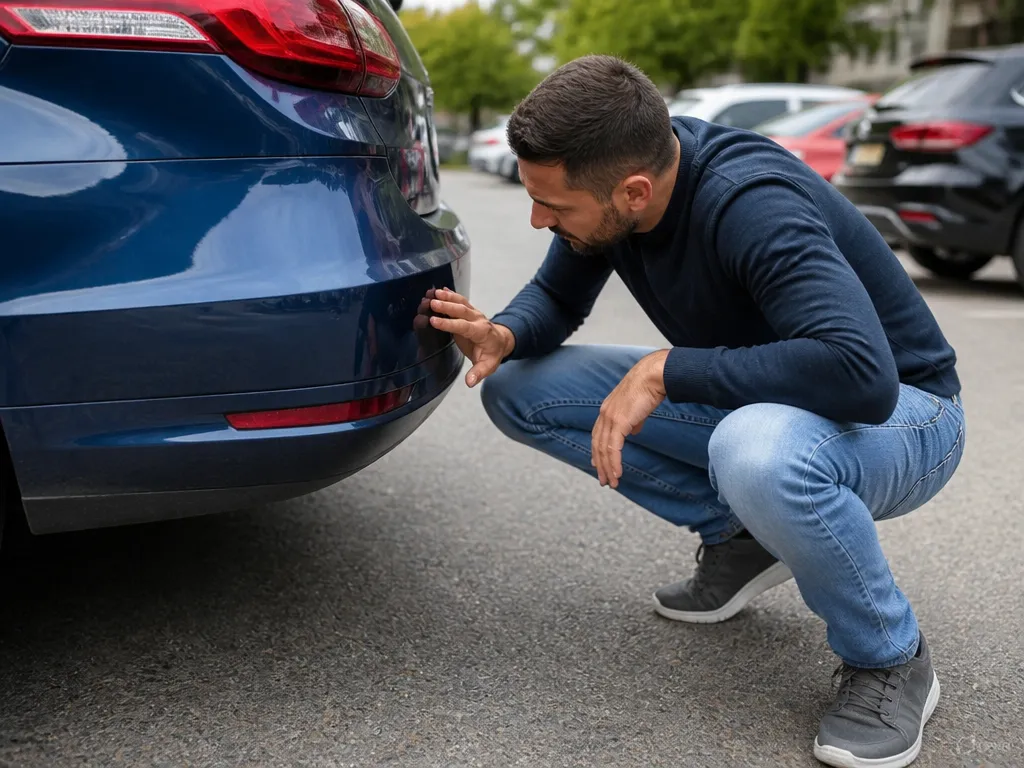
Most useful first checks are visible. Walk around the vehicle and compare the sensors with one another rather than looking at only the warning message.
Look for:
- A sensor cap that is missing or popped out.
- A sensor face that is cracked, scratched, or covered with heavy grime.
- A bumper cover that does not sit flush.
- A sensor that is noticeably deeper, tilted, or higher than the others.
- A bent bracket near a sensor mount.
- Wiring or a connector hanging below the bumper.
- A camera lens covered by dirt, wax, water spots, or ice.
If you find visible damage, stop repeating resets. A damaged mount or misaligned sensor requires inspection and possibly replacement or recalibration. Continuing to test the system in tight spaces will not correct the underlying problem.
💡 Use these telescoping inspection mirrors to get a clear, magnified look at your bumper sensors without needing to crawl underneath. Telescoping Inspection Mirror, 2 Pack Round & Rectangular Mechanic Mirrors.
Why the System Shuts Itself Off
The warning is a safety response. Parking assist is designed to withdraw its alerts when the vehicle cannot measure distance reliably. That is preferable to giving you a confident warning based on distorted readings.
Dirt, ice, misalignment, and sensor failure can all make an object appear closer or farther away than it is. Disabling the feature prevents you from treating unreliable proximity alerts, automatic braking, or parking guidance as dependable.
The message also narrows the troubleshooting area. Start around the bumpers and camera rather than assuming the vehicle has a general engine or battery problem. A low 12V battery can trigger driver-assist faults, but visibility, alignment, and individual sensor problems are more common explanations for this specific warning.
Why Acting Early Helps
If the cause is environmental, cleaning the vehicle promptly may restore normal function. This is especially likely when the warning begins after a muddy drive, snow, rain, or a recent wash.
If cleaning and a restart do not work, acting early tells you to stop guessing and arrange a scan. Repeatedly restarting the vehicle for several days will not repair a failing sensor or damaged wiring, and it leaves you without parking assistance in the meantime.
Choosing Between a Home Check, a Scan, and a Repair
There are three practical ways to address the warning: perform a basic inspection and reset, arrange a diagnostic scan, or have a damaged component repaired and aligned. The right choice depends on how the warning began and whether it clears.
Option 1: DIY Inspection and Reset
Use this approach when:
- The warning started after bad weather or a dirty drive.
- You can see grime, ice, or water on the sensors or camera.
- You recently washed the car.
- There was no curb hit, parking scrape, collision, or bumper work.
Clean the sensors and lens, remove possible obstructions, inspect the bumper, power-cycle the car, and test at low speed. If the warning clears and does not return, no further action may be necessary.
Option 2: Diagnostic Scan
Arrange a scan when:
- The message persists after cleaning.
- It appears on every trip.
- It returns immediately after start-up.
- It comes with other driver-assist messages.
- The warning clears briefly but returns repeatedly.
- You cannot find a visible cause.
A dealer or repair shop can read stored fault codes for the parking sensors, camera calibration, and communication circuits. The wording “temporarily unavailable” does not identify the failed part by itself. A scan can help determine whether one sensor is failing, a connector is intermittent, the wiring harness is damaged, or the system needs recalibration.
Option 3: Sensor, Wiring, or Bumper Repair
Choose inspection and repair when:
- A sensor is cracked, missing, or pushed out of position.
- The bumper cover is damaged or does not sit correctly.
- The warning began immediately after a collision or bumper replacement.
- A sensor or connector was disturbed during other rear-end work.
- Cleaning and power-cycling have made no difference.
Repairs may involve reseating or replacing a sensor, repairing a connector or harness, correcting bumper-cover alignment, and confirming that each sensor is positioned correctly. Some vehicles also require camera recalibration after body work.
A Decision Table for the Warning
| Situation you see | Most likely cause | Best next step |
|---|---|---|
| Warning appears after mud or snow and clears after cleaning | Contamination on sensors or camera | Clean the sensors and lens, then retest |
| Warning appears immediately after a curb hit | Bent or misaligned sensor or damaged mount | Inspect the mounting and have the sensor checked |
| Warning appears randomly and never clears fully | Intermittent sensor fault or wiring problem | Get a diagnostic scan with fault codes |
| Warning clears for a day and then returns | Intermittent connector or aging sensor | Scan the system and inspect harness routing |
| Warning returns with other assist warnings | Broader driver-assist module issue | Arrange dealer or repair-shop diagnostics |

Helpful pick
Securityman Garage Stop Sign Parking Aid (2 Pack) | Garage Stoppers for Your Vehicle – Easy Car Marker Sensor Indicator Assist Guide
When your vehicle’s electronic sensors fail, these simple garage stop signs provide a physical, worry-free way to park your car safely.
How to Test the System Safely
Do not test a malfunctioning parking-assist system by backing toward a valuable vehicle, wall, or narrow object. Use an open, controlled area with few obstacles and keep your attention on the mirrors, camera, and surroundings.
A safe test looks like this:
- Drive at low speed.
- Back straight before trying a slight angle.
- Watch whether the warning appears immediately or after traveling a short distance.
- Note whether the warning occurs near one side of the vehicle.
- Stop if the system gives inconsistent alerts or if visibility is poor.
- Keep using direct visual checks even if the warning disappears.
A warning that appears consistently when one part of the bumper faces an obstacle may point to a specific sensor location. A warning that appears as soon as the vehicle starts may indicate a stored fault rather than a temporary obstruction.
Also identify whether the vehicle uses ultrasonic sensors, a camera-only system, or both. Camera systems depend heavily on a clean lens and clear visibility. Ultrasonic systems depend more on clean sensor faces, correct mounting, and unobstructed sensor fields.
What Not to Do
Avoid:
- Scraping sensor faces with hard tools.
- Using abrasive cleaners on sensors or camera lenses.
- Spraying high-pressure water directly into sensor openings.
- Covering sensors with accessories, stickers, or protective material.
- Relying on automatic braking or proximity guidance while the warning remains active.
- Repeatedly resetting the vehicle after finding obvious physical damage.
Pay particular attention after bumper work. A cover can look correctly installed while leaving a sensor slightly out of position. “Close enough” is not always sufficient for a system that depends on precise sensor angles.
💡 If your factory parking sensors are unreliable, this adjustable laser parking guide provides a consistent, visual alternative for safe garage parking. Norkmdi Car Parking Guide Assist Laser Sensor, 360 Degree Adjustable Laser Assist Stop Light Distance Vehicle Parking Aid, Motion Activated Auto Stop Indicator Assistance, Universal Fit.
Common Situations and the Likely Fix
After Rain and a Dusty Drive
A driver sees the warning after heavy rain followed by a dusty commute. Cleaning the rear sensor area with water and a microfiber cloth clears the prompt after the next restart and a short backing maneuver. That pattern points to temporary contamination that prevented the sensors from receiving reliable returns.
After a Curb Strike
A driver hits a curb at low speed and sees the warning two minutes later while parking. One sensor sits slightly deeper than the others, and cleaning does not restore the system. The sensible next step is a sensor inspection and mounting-alignment check, not more restarts.
With a Bike Rack Installed
A shopper removes and reinstalls a bike rack for a weekend trip. The warning appears while backing with the rack installed and clears after the rack is removed. That pattern points to an obstruction or reflection problem. The fix may be changing the rack position or using a setup that does not block the sensor field.
With Several Driver-Assist Warnings
A vehicle consistently reports problems with parking sensors and another driver-assist feature. Cleaning changes nothing across several drive days. That pattern supports arranging a diagnostic scan so a technician can identify whether the issue involves a sensor module, connector, wiring harness, or calibration.

Helpful pick
Mandark Flashing LED Stop Sign for Garage Parking Assist, Adjustable Height Automotive Garage Parking Stopper, Vehicle Exterior Stop Indicator Sensors, Universal for RV, SUV, Truck
Avoid future parking stress by installing this adjustable LED stop sign, which helps you park perfectly even when vehicle sensors are unavailable.
FAQ
Is “Parking Assist Temporarily Unavailable” Dangerous?
It can create a safety risk if you continue relying on the disabled system. The warning usually means the system is not ready to provide dependable assistance, not that the vehicle is unsafe to drive under all conditions.
Back up more slowly than normal, use your mirrors and backup camera if available, check the area directly, and stop using automatic proximity prompts until the message clears or the system is repaired.
How Much Does It Cost to Fix?
The cost depends on the cause. Cleaning is free, while replacing one sensor plus labor can cost hundreds of dollars. Camera calibration or wiring repairs can cost more, and recent impact or body work may add diagnostic time because the shop needs fault codes to identify the correct repair.
How Long Should the Warning Last?
If dirt, ice, or camera-lens contamination caused the warning, it may clear after cleaning and a restart, sometimes within the next few drive minutes.
If the message remains through multiple start-and-drive cycles, especially across a full day, arrange a diagnostic scan rather than waiting indefinitely. A warning that returns on every trip is more consistent with a fault than with temporary contamination.
What Should I Do First?
Clean the sensor areas and camera lens if equipped. Inspect the bumper for cracks, dents, a loose sensor cap, or a sensor that is out of position. Remove nearby accessories, power-cycle the vehicle, and test at low speed in a safe area.
If the warning returns immediately or never clears, have the system scanned.
Can a Dead Battery Cause This Message?
A low or failing 12V battery can trigger several driver-assist faults, including sensor communication problems. However, this warning is more commonly related to sensor visibility, alignment, or a specific sensor fault.
If the vehicle has recently had battery problems, check the battery’s health. Still perform the cleaning and inspection steps, because a battery check will not identify a dirty camera lens, blocked sensor, or damaged bumper mount.
Disclosure: As an Amazon Associate, I may earn from qualifying purchases at no extra cost to you. Amazon and the Amazon logo are trademarks of Amazon.com, Inc, or its affiliates.
- Amazon, Amazon Prime, the Amazon logo and Amazon Prime logo are trademarks of Amazon. com, Inc. or its affiliates.

Hi, I am AKM Sad. I’m a car enthusiast and reviewer who loves exploring gadgets and accessories. I share honest reviews and practical tips to help you get the best products and enjoy a safer, smoother ride.