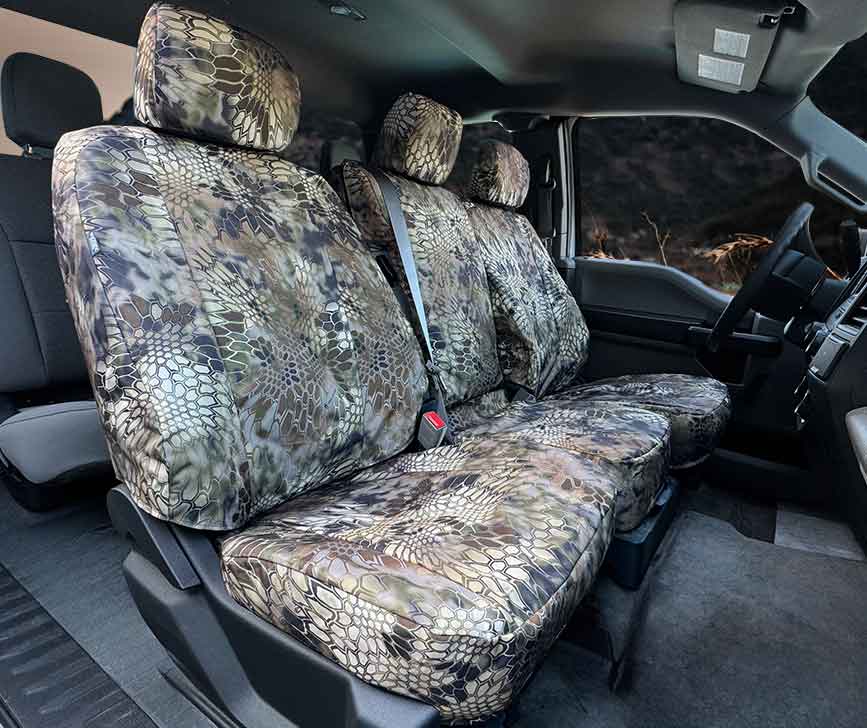
Slip covers on, secure straps and hooks, smooth fabric, and you’re done.
If you want a tight, clean fit without tools, you’re in the right place. I’ll show you how to install Explorer seat covers tool-free with clear steps, pro tips, and real fixes I use on customer cars. The goal is simple: a snug fit that looks stock and holds up to daily life.
Why tool-free installation matters
How to install Explorer seat covers tool-free saves time and stress. It avoids loose bolts, stripped screws, or damage to trim. It also cuts risk around airbags and seat electronics.
Tool-free systems use elastic hems, buckles, hooks, and Velcro. Good sets fit like a glove and need no drilling. They also protect resale value since you do not alter the seat.
I have tested many Explorer seat covers in shops and at home. Tool-free kits give the fastest, safest results for most drivers.
Know your Explorer seats
How to install Explorer seat covers tool-free starts with knowing your trim. Ford Explorer seats vary by year and package. Many newer models have seat-mounted side airbags. Some trims use power seats, ventilated seats, or lumbar switches.
Look for these features before you start:
- Side airbags in the seat shoulder
- 60/40 split bench in row two
- Third-row folding seats
- Removable headrests and armrests
- Seat heater or cooler zones
Check your owner’s manual for airbag notes and seat heater use. It helps you line up cutouts and avoid blocked seams.
Prep and checklist
How to install Explorer seat covers tool-free works best with simple prep. A clean seat helps covers grip and stay tight.
Have these on hand:
- Your seat cover set with tags for front, rear, headrests
- A small towel and mild cleaner
- A vacuum with a crevice tool
- A plastic trim card or a clean ruler for tucking
- A soft brush for cloth, or a microfiber for leather
Quick prep steps:
- Park on level ground. Open all doors for space.
- Slide seats back, then forward, to expose gaps and rails.
- Vacuum cracks, seams, and under-seat areas.
- Wipe sweat and oils from leather or vinyl. Let dry.
- Sort covers by seat and side. Left and right matter.
A little prep makes installs fast and clean. It also keeps wrinkles away.
Source: nwseatcovers.com
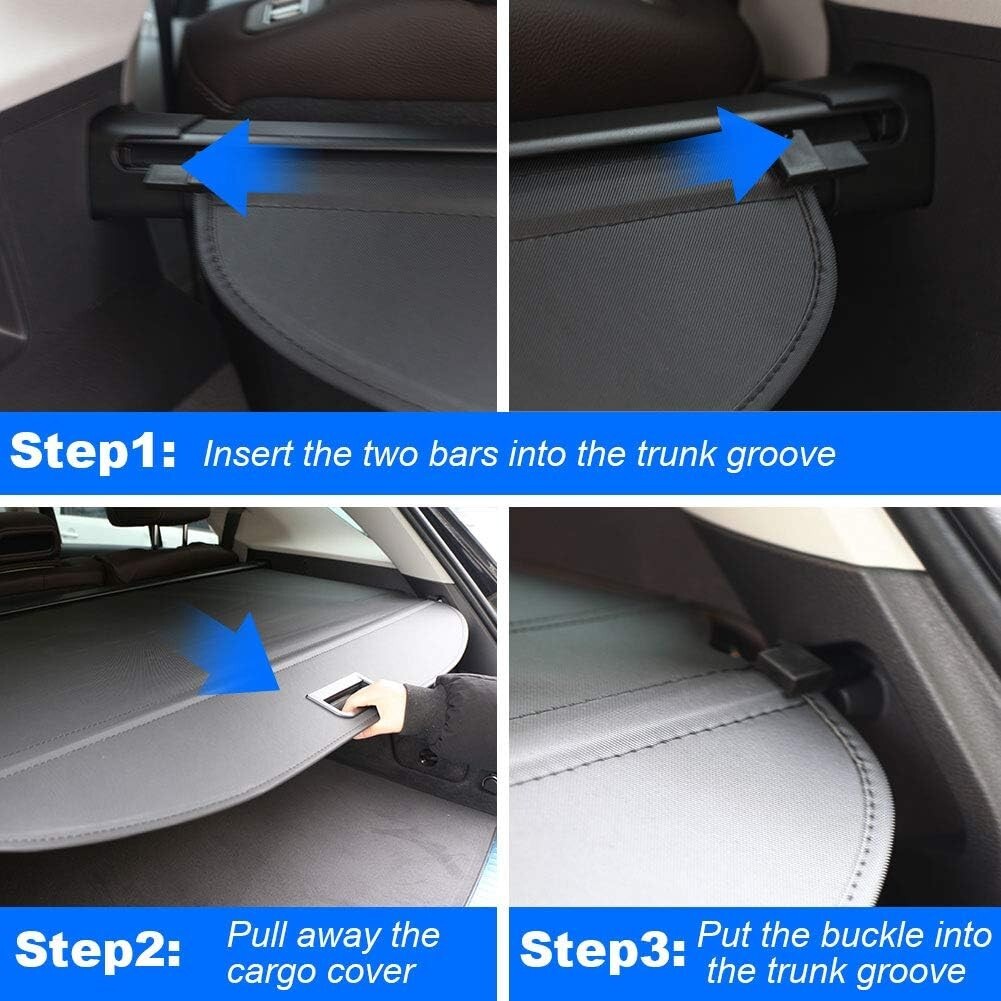
Step-by-step: How to install Explorer seat covers tool-free
How to install Explorer seat covers tool-free is simple if you go seat by seat. Follow this order for the best fit and least rework.
Front seat bases:
- Move the seat to its highest point. Slide it back.
- Slip the base cover over the front lip first.
- Pull the cover back and down to the rear edge.
- Feed straps through the gap between the base and back.
- Buckle under the seat. Use the shortest safe length.
- Tighten the buckle. Tug side to side to remove slack.
- Tuck side flaps into plastic trim with a trim card.
Front seat backs:
- Line up the airbag tag with the airbag side.
- Slide the back cover over the headrest posts.
- Pull it down. Smooth wrinkles as you go.
- Join Velcro flaps under the seat back.
- Check that the airbag seam is not blocked.
- Press fabric into edges for a factory look.
Headrests:
- Remove headrests with the release buttons.
- Slide covers on. Align seams to the front.
- Reinstall headrests. Confirm full up and down travel.
Second-row 60/40 split:
- Fold the seat backs forward.
- Remove headrests.
- Slip back covers on first. Align latch cutouts.
- Feed straps through hinge gaps. Buckle and tighten.
- Flip the backs upright. Check fold-flat function.
- Slip base covers over cushions.
- Pull straps through seat gaps. Buckle and tighten.
- Cutouts should clear seat belt buckles and child-seat anchors.
Third row:
- Fold flat. Clean gaps.
- Slip back covers on from the top. Align pull straps.
- Buckle and snug from the rear cargo area.
- Cover the base cushions last. Test fold and stow.
Final fit check:
- Move all seats through full travel.
- Engage seat heaters if equipped. Confirm normal warmth.
- Test airbags are not blocked. Look for SRS labels.
- Smooth fabric with your palms. Short, firm strokes help.
Take your time on the first seat. The rest go fast. A steady pull, not a hard yank, keeps seams true.
Source: ebay.com
Pro tips from the field
How to install Explorer seat covers tool-free can feel easy with a few tricks. These tips come from years of daily installs.
What I do on every job:
- Warm the covers. Set them in the sun for ten minutes. Warm fabric stretches and molds better.
- Start at the front edge. It anchors the shape.
- Tighten in stages. Snug, smooth, then final-tighten.
- Use a trim card. It tucks flaps without damage.
- Do not sit on wrinkled fabric. Fit first, sit second.
Common mistakes to avoid:
- Mixing left and right pieces.
- Blocking the side airbag seam.
- Over-tightening one strap and leaving the rest loose.
- Hiding the buckle under moving rails where it can rub.
A few minutes of care gives a stock look that lasts.
Read More: Ford F-150 Heated Seat Covers Replacement
Troubleshooting and fine-tuning
How to install Explorer seat covers tool-free sometimes needs tweaks. Most issues have quick fixes.
If fabric slides:
- Clean the seat surface again.
- Add a thin non-slip mat under the base section.
If you see wrinkles:
- Warm the area. Pull and smooth toward seams.
- Re-seat the corners. Tension should flow front to back.
If buckles rattle:
- Wrap the buckle in a small cloth sleeve.
- Route straps away from rails and motors.
If headrests feel tight:
- Work the cover down with short presses.
- Check that the seam sits forward, not twisted.
Take a short drive and re-check tension. Seats settle after a day.
Care and maintenance
How to install Explorer seat covers tool-free is only step one. Care keeps them fresh and tight.
Simple care plan:
- Vacuum weekly. Grit wears fabric like sandpaper.
- Spot clean spills at once. Blot, do not rub.
- Use mild soap on cloth. Use a leather-safe cleaner on leather.
- Air-dry covers. Avoid high heat that can shrink fabric.
- Re-snug straps every few months.
Most covers are safe for heated seats. Do not use harsh chemicals. They can dry vinyl and leather.
Safety notes and airbag compatibility
How to install Explorer seat covers tool-free must keep safety first. Many Explorers use seat-mounted side airbags. Your cover should be airbag-compatible with a marked tear seam.
Do this before you start:
- Confirm the cover has SRS tags or airbag labels.
- Match the airbag side to the airbag seam.
- Do not stitch, tape, or glue the seam.
Always test seat movement after install. Check lumbar, recline, and power functions. If anything binds, refit that area.
When tool-free may not work
How to install Explorer seat covers tool-free fits most cases. Still, some setups may need extra steps.
You may need a different plan if:
- You have seat add-ons like screens or aftermarket lumbar pads.
- The cover brand is not cut for your model year.
- You use heavy-duty neoprene that needs extra stretch time.
If your set does not list your exact trim, contact the maker. Ask for a cut sheet or a year-specific pattern. A proper match beats force.
Frequently Asked Questions of How to install Explorer seat covers tool-free
Will seat-mounted airbags still work with covers?
Yes, if the covers are airbag-compatible. Look for SRS labels and keep the tear seam aligned on the airbag side.
How long does the install take for all three rows?
Plan 60 to 90 minutes the first time. After you learn the flow, you can do it in under an hour.
Do tool-free seat covers fit every Ford Explorer year?
Most brands cut for generations and trims, not every year. Check fit notes for your exact model and seat type.
Can I use heated and cooled seats with covers?
Heated seats usually work fine with compatible covers. Ventilated seats may feel reduced airflow depending on fabric.
How do I stop covers from sliding on leather?
Clean the seat, then snug straps in stages. A thin non-slip underlay under the base also helps.
Are tool-free hooks and buckles safe under power seats?
Yes, if routed away from moving rails and motors. After install, run full seat travel to confirm clearance.
Will covers block ISOFIX or LATCH points in the second row?
Good covers have cutouts for child-seat anchors. Align them during install and check access by hand.
Conclusion
You now know how to install Explorer seat covers tool-free with confidence. Clean seats, smart routing, and steady tension are the keys to a tight, factory look. A careful first pass saves time on every other seat.
Set aside an hour, follow the steps, and enjoy a fresh cabin. Try these tips today, and share your results or questions in the comments. If you found this helpful, subscribe for more easy DIY guides.
Disclosure: As an Amazon Associate, I may earn from qualifying purchases at no extra cost to you. Amazon and the Amazon logo are trademarks of Amazon.com, Inc, or its affiliates.
- Amazon, Amazon Prime, the Amazon logo and Amazon Prime logo are trademarks of Amazon. com, Inc. or its affiliates.

Hi, I am AKM Sad. I’m a car enthusiast and reviewer who loves exploring gadgets and accessories. I share honest reviews and practical tips to help you get the best products and enjoy a safer, smoother ride.


