A 6-sensor kit with a clear distance display is the best choice for most US drivers. It covers more of a bumper than a 4-sensor system without the extra drilling and wiring of 8 sensors. Choose a 4-sensor kit for a compact car with a narrow bumper and simple parking situations. Choose 8 sensors for an SUV, truck, wide bumper, or frequent curb-level parking.
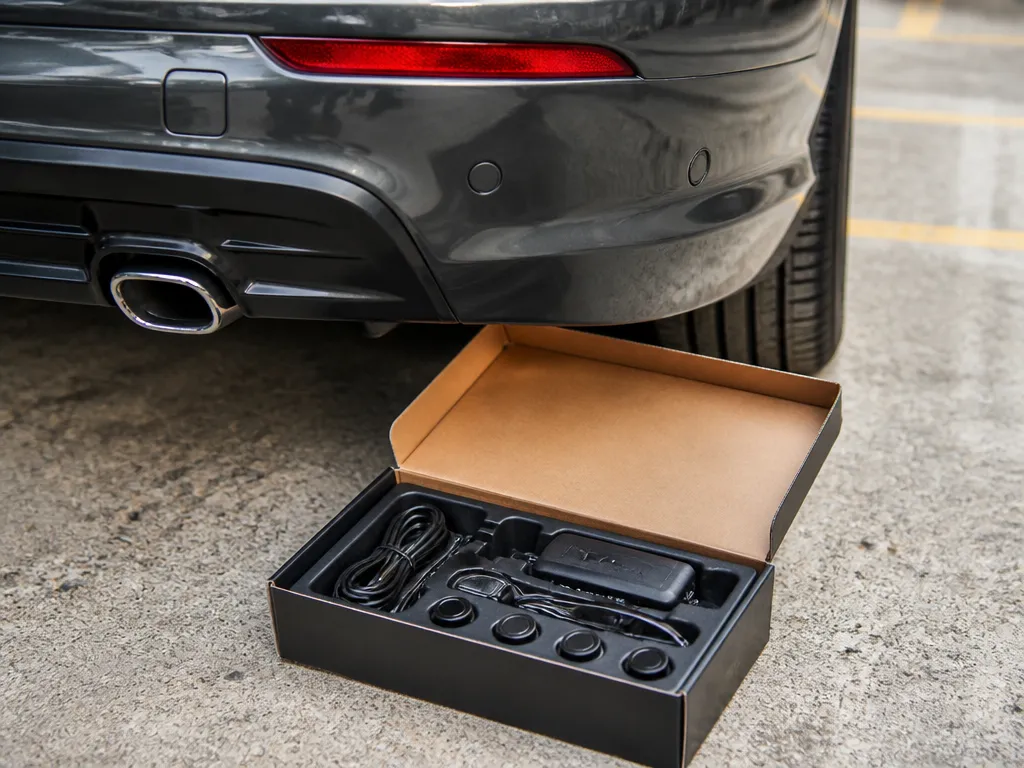
Parking sensors cost far less than a bumper replacement, but the right kit depends on your vehicle and installation limits. A typical DIY kit includes 4, 6, or 8 ultrasonic sensors, a control box, and a beeper that speeds up as you get closer. Some add a digital distance display, sensitivity controls, or a no-drill mounting system.
Look for automatic activation, a reliable wiring harness, and either a clear beeper pattern or readable distance display. Avoid kits that claim “universal fit” without explaining sensor spacing or bumper compatibility.
Best Parking Sensor Kits at a Glance
| Option | Key Spec / Price Range (verify current) | Best For | Main Tradeoff |
|---|---|---|---|
| 4-Sensor DIY Kit | 4 ultrasonic sensors, beeper or bar display (varies) | Compact cars, shorter bumpers, budget installs | Can miss centered obstacles behind you |
| 6-Sensor Coverage Kit | 6 sensors, wider distribution | Mid-size sedans, crossovers, tighter lots | Slightly more drilling and wiring complexity |
| 8-Sensor Wide Coverage Kit | 8 sensors, highest bumper coverage (varies) | SUVs, trucks, wide bumpers, frequent curb-level parking | More sensors to align and maintain |
| Digital Display + Beeper Kit | Distance bars/numbers plus tone | First-time users, garages, busy parking lots | Higher cost than beeper-only options |
| Adjustable Sensitivity Kit | Sensitivity control or mode switch | Homes near walls, textured surfaces, frequent “nuisance beeps” | Too low sensitivity can miss close obstacles |
| No-Drill/Clip System Kit | No-drill mounting (when supported) | People who want minimal bumper modification | Fitment can be fussier and less consistent |
Spend more for a digital display if you have trouble interpreting tones, park in noisy lots, or regularly maneuver in a tight garage. If you can hear and recognize a beeper’s cadence easily, a beeper-only kit can save money.
💡 This 8-sensor kit provides comprehensive coverage for larger vehicles, ensuring you have eyes on every corner of your bumper. ELSNU Car Parking Sensors Kit Reverse Radar parktronic System Auto Electronics Vehicle Back Assistant Reverse 8 Sensor (Black).
Key Takeaways
- Choose sensor count based on bumper length: 4 for compact cars and 6-8 for wider coverage.
- Match the reverse trigger to your vehicle with a harness or proper wire testing.
- Choose the alert style you can interpret quickly: beeper, digital display, or both.
- Prioritize wiring quality because poor harnesses cause many failed or unreliable installations.
- Check the mounting method before buying, especially if you do not want to drill the bumper.
- Test every sensor before final mounting so you can correct alignment and wiring problems early.
What to Check Before Buying a Parking Sensor Kit
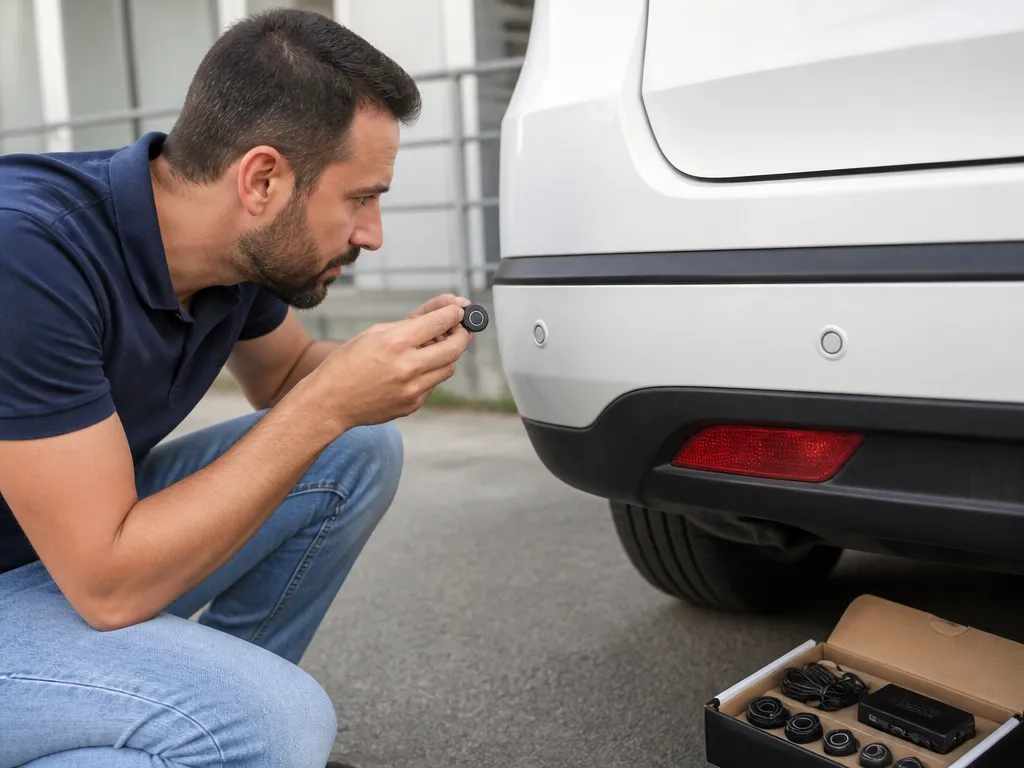
A parking sensor kit is only part of the system. Sensor placement, wiring, and bumper alignment determine whether it works reliably. Many problems blamed on the electronics actually come from loose connections, poor sensor placement, or the wrong reverse trigger wire.
Most kits include the same basic components: sensors mounted in the bumper, a control module, a wiring harness, and an audible or visual alert. Some also include a camera trigger output, but that is not common.
Confirm these details before ordering:
- Sensor count: Kits generally include 4, 6, or 8 sensors.
- Sensor type: The usual choice is ultrasonic.
- Mounting method: Check whether the kit requires drilled holes, clip-in rings, or no-drill mounting.
- Alert format: Decide between a beeper, digital display, or both.
- Reverse activation: Verify how the system connects to your vehicle’s reverse signal.
- Spacing guidance: Make sure the template or instructions suit your bumper.
Plastic bumpers are generally straightforward to drill, but a finished fascia requires careful measurement and clean hole trimming. Check behind the bumper for brackets, reinforcement, grilles, and wiring before making any holes.
Beeper-only systems can work well, but you need to learn the cadence. A digital display with distance bars or numbers is easier for many first-time users, especially in tight garages or parking lots with tall curbs.
If you do not want to drill your bumper, buy only a kit that explicitly supports no-drill mounting. Otherwise, budget for professional installation or choose a different system.
How the Kits Compare in Real Parking Situations
The strongest kits make three decisions easier: where to mount the sensors, how to connect the system, and how to interpret the warning. A kit that looks impressive on the box is not useful if its template does not suit your bumper or its alarm is impossible to hear.
Four sensors – two per side – cover the corners well but can miss an object directly behind the vehicle. Six or eight sensors distribute coverage across more of the bumper, which helps with longer SUVs, trailers, and bumpers with wide lower openings.
More sensors also mean more installation work. Every sensor needs a clean, properly aligned hole, and every connection adds another potential failure point.
Alarm design affects reaction time. A beeper that ramps up quickly provides useful urgency, but an overly sensitive system can alert constantly around curbs, walls, or other reflective surfaces. A digital display offers a steadier reference and can be easier to understand in a busy parking lot.
The wiring harness deserves close attention. A good harness should reach through typical US vehicle routing, use clear connectors, and include enough strain relief to keep vibration from loosening terminals. A kit with bare wires and vague instructions may still work, but it shifts more of the installation risk to you.
A mute option, constant-tone mode, or sensitivity adjustment can prevent nuisance alerts. Those controls are especially useful when you regularly back toward the same wall, garage door, hitch receiver, or textured surface.
Installation Tips That Prevent False Alerts
Plan the sensor locations around the bumper rather than blindly following a template. A template may not account for your vehicle’s reinforcement, lower grille, curves, or factory wiring.
Measure twice and dry-fit once. Mark the drilling points, then hold each sensor in position or use a temporary guide. Confirm that no bracket, grille support, reinforcement, or wiring path sits behind the proposed hole. A sensor installed at an angle can give poor readings even when the hole looks clean.
Use the correct reverse trigger method. Many systems draw their activation signal from the reverse-light circuit, but the wiring varies by vehicle. Use the included harness when it is designed for your setup. If you must identify wires yourself, use a proper test light or multimeter instead of guessing.
Route wiring away from heat and sharp edges. Follow existing channels where possible, use zip ties without pulling the wires tight, and protect crossing points with grommets. Vibration and abrasion can damage a harness long after the installation appears complete.
Adjust sensitivity only after you understand the system’s normal behavior. Snow, mud, textured walls, curbs, and other reflective surfaces can cause false alerts. Reduce sensitivity until ordinary parking produces warnings only when you need them, but do not turn it down so far that close obstacles disappear.
Use this checklist before purchase and again before drilling:
- Count sensors for your bumper width: 4, 6, or 8.
- Verify the mounting method: drill, no-drill, clip-on rings, and template fit.
- Confirm the power and reverse-trigger approach: harness or manual wire identification.
- Check harness length and cable-routing options.
- Look for a test mode or temporary activation instructions.
- Consider the obstacles near your parking spaces: curbs, walls, poles, and garage doors.
Helpful pick
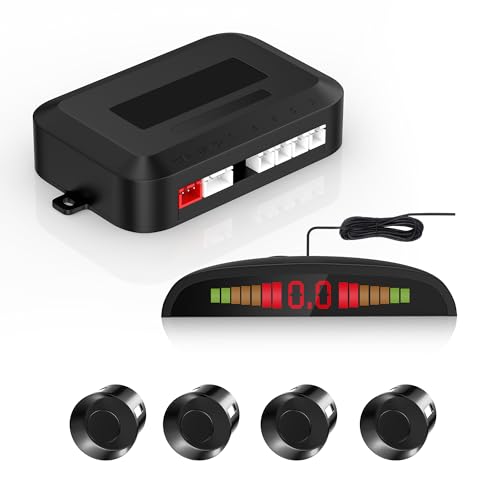
Car Reverse Backup Sensor – Universal Parking Sensors for Car with 4 Rear Sensors, LED Distance Display & Beep Alert – Backup Sensor Kit for Cars, SUVs, Trucks (Black)
This universal kit features an LED display and audible alerts, making it an excellent choice for those verifying their setup requirements.
Where Parking Sensor Kits Pay Off
A good sensor kit reduces panic braking and last-second steering corrections by giving you distance information that mirrors cannot provide. That helps when parking spaces are uneven, curbs are higher than expected, or the surface changes from concrete to asphalt.
The benefit is greater when the space behind the vehicle is hard to see. Common examples include US street parking, tight driveways, and garages where a wall or door frame blocks the rear view.
A consistent beeper ramp or digital display also makes parking repeatable. Instead of learning by bumping, you can use the warning pattern to stop at a similar distance each time.
DIY kits are typically far cheaper than dealer-installed parking sensors. Even with shop installation, a modular kit can cost less than a fully integrated OEM retrofit and may allow you to replace an individual sensor or control module later. Parts availability varies by brand, but modular systems are generally easier to repair than sealed, vehicle-specific retrofits.
Coverage is the main trade-off. Too few sensors for the bumper shape can leave a blind spot directly behind the vehicle or between the corner sensors. The best kit matches your vehicle and parking environment rather than simply having the highest sensor count.

Helpful pick
VALEO Beep and Park Parking Assistance Kit with 4 Sensors + 1 Speaker – Front or Rear Mounting 632200
The Valeo system is designed to reduce parking stress by providing precise distance information, helping you avoid obstacles in tight spaces.
Best Kit by Vehicle and Parking Situation
Best for Compact Cars: 4-Sensor Kit
A 4-sensor kit usually suits a small car with a narrow rear bumper and ordinary parking needs. The corner sensors provide useful warning without covering the entire bumper with detection zones.
The limitation appears when you reverse toward a pole, centered gate, or other narrow obstacle directly behind the car. If that situation is common, step up to a 6-sensor system.
Best for Sedans and Crossovers: 6-Sensor Kit
A 6-sensor kit is the practical sweet spot for a mid-size sedan or crossover. Its wider distribution improves warnings when an obstacle sits near the centerline or shifts slightly from one parking attempt to the next.
It is also a good fit for shared parking areas where the object behind you might be a pillar, dumpster edge, or another vehicle parked at a different angle each day.
Best for SUVs and Trucks: 8-Sensor Kit
An 8-sensor kit makes sense for wide bumpers, longer vehicles, and frequent curb-level parking. SUVs and trucks can leave larger gaps between sensors, and their height or approach angle may make centered obstacles harder to judge.
The trade-off is installation time. You have more holes to align, more wires to route, and more sensors to keep clean. Buy an 8-sensor kit only when the extra coverage matches your vehicle or parking habits.
Best for First-Time Users
A readable distance display is easier to learn than tones alone. Bars or numbers provide a consistent reference when you back into a garage or parking space and do not stop at exactly the same point every time.
A combined display-and-beeper system is especially helpful in noisy parking lots, where an audible warning can blend into traffic and surrounding alarms.
Best Near Walls and Barriers
If your driveway or parking space has textured walls, close barriers, or surfaces that trigger constant alarms, choose a kit with sensitivity adjustment or multiple modes. Frequent nuisance beeps are often a tuning problem rather than a defective product.
Lower the sensitivity carefully. If you reduce it too far, the system may stop warning you about genuinely close obstacles.
Best for Minimal Modification: No-Drill Kit
A no-drill or clip-on system is the right category for anyone who wants to avoid permanent bumper holes. Confirm that the mounting method fits your bumper before buying.
These systems can be fussier and less consistent than drilled sensors because the clips may not hold each sensor at the ideal angle. If you choose no-drill mounting, accept that fitment and alignment may require extra adjustment.
My Buying Advice for Parking Sensor Kits
Start with installation constraints, then choose sensor count and alert style. Buying the most feature-heavy kit first often creates unnecessary work.
If you are comfortable measuring carefully and drilling straight holes, drilled sensors generally provide a firmer long-term installation. If you want no permanent modification, a no-drill system may be worth the fitment trade-off, but check the mounting hardware closely.
Choose a kit with a clear wiring plan. A harness that connects to a known reverse signal is easier and less error-prone than vague instructions telling you to identify wires without useful guidance. If you are not comfortable with a multimeter or test light, avoid a kit that leaves the trigger circuit entirely to guesswork.
Match the alert to your surroundings. A beeper may be enough in a quiet garage, while a digital display is easier to follow in traffic or a crowded parking lot. Sensitivity adjustment is worth prioritizing if you park near walls, curbs, hitch receivers, or heavily textured surfaces.
Treat “universal” as a starting point, not a guarantee. Sensor spacing and bumper shape determine the real fit. If the instructions do not explain how to adapt the template to your vehicle, expect more alignment work.
A mid-tier kit installed correctly is a better buy than an expensive system with crooked sensors or loose wiring.

Helpful pick
Promata PS01 Car Front Parking Sensor Kit with Buzzer,4 58KHz OE Standard Sensors,Radio Mute & Bull-bar Recognition Function,Detection Distance(13~39 inch)
This front parking sensor kit is ideal for those who prioritize safety and want to avoid obstacles while pulling into parking spots.
FAQ
Which parking sensor kit is best for a small car?
A 4-sensor kit is usually the best match because its corner coverage suits a small car’s bumper. Choose a system with a clear beeper cadence or distance bars so you can interpret alerts quickly. If you often reverse toward centered obstacles in tight spaces, a 6-sensor kit provides better coverage.
How hard is it to install a parking sensor kit at home?
Most DIY kits are moderately difficult because drilling the bumper requires accurate measurements and straight holes. You typically need a drill, the correct hole saw or bit size specified by the kit, and a way to verify sensor alignment.
Misidentified reverse wires and loose connectors are common failure points.
Do parking sensors work in bad weather?
Parking sensors generally work in rain and light snow because ultrasonic sensing does not depend on visibility. Heavy snow buildup, mud on the sensor faces, and thick ice can interfere with readings.
Keep the sensor faces clean and avoid mounting them where road splash hits constantly.
Can I use a parking sensor kit with a trailer?
Yes, but expect some edge cases. The sensors measure objects behind the vehicle, and a trailer can create reflections or change the clearance around the bumper.
If you back with a trailer often, choose 6 or 8 sensors and consider sensitivity adjustment to reduce nuisance alerts.
What is the most common mistake buyers make?
The most common mistake is buying the wrong sensor count or relying on unclear fitment instructions for the bumper. Many buyers also skip temporary testing and discover misalignment only after the sensors are permanently mounted.
Verify the template and inspect the space behind the bumper before committing to the final holes.
Disclosure: As an Amazon Associate, I may earn from qualifying purchases at no extra cost to you. Amazon and the Amazon logo are trademarks of Amazon.com, Inc, or its affiliates.
- Amazon, Amazon Prime, the Amazon logo and Amazon Prime logo are trademarks of Amazon. com, Inc. or its affiliates.

Hi, I am AKM Sad. I’m a car enthusiast and reviewer who loves exploring gadgets and accessories. I share honest reviews and practical tips to help you get the best products and enjoy a safer, smoother ride.