To fix a brake sensor, first diagnose the issue using a diagnostic tool, then replace or clean the malfunctioning sensor. Consult your vehicle’s manual for specific instructions.
Understanding the intricacies of your vehicle’s brake system is crucial when tackling issues like a faulty brake sensor. This integral component ensures that your vehicle’s safety features, such as ABS and traction control, function correctly by relaying the speed of your wheels to the onboard computer.
Ignoring a defective brake sensor can lead to diminished brake performance or even failure, making it essential to address this problem promptly. The process generally involves locating the sensor, which is situated near the wheel hub, then carefully following a series of steps to restore its operation or replace it if necessary, all while observing safety precautions like disconnecting the battery to avoid electrical mishaps.
Preparing For Brake Sensor Repair
Maintaining your vehicle’s safety systems is crucial, and repairing a faulty brake sensor is a task that can save lives. Before diving into the repair process, it’s important to prepare adequately to ensure the procedure is smooth and safe. Here are the essential steps you should follow to get ready for brake sensor repair.
Safety Considerations Before Starting
Working on your vehicle’s brake system requires careful attention to safety. Here are measures you need to take:
- Wear protective gear: Safety glasses and gloves are essential to protect from dust and sharp objects.
- Ensure a well-ventilated area: Brake repairs can involve harmful dust and fumes.
- Chock the wheels: Prevent the vehicle from rolling while working on it.
- Use a sturdy jack and jack stands: Never rely on the jack alone for support.
- Disconnect the battery: Minimize the risk of electrical shorts or accidental engagement of electronic components.
Gathering Necessary Tools And Parts
Having the right tools and parts at hand makes brake sensor repair more efficient:
- Replacement brake sensor: Ensure it’s the correct model for your vehicle.
- Basic hand tools: Wrenches, sockets, and screwdrivers are commonly needed.
- Wire cutters and strippers: If splicing is required for your sensor model.
- Brake cleaner: For cleaning the area around the sensor.
- Multi-meter: To test electrical connections if necessary.
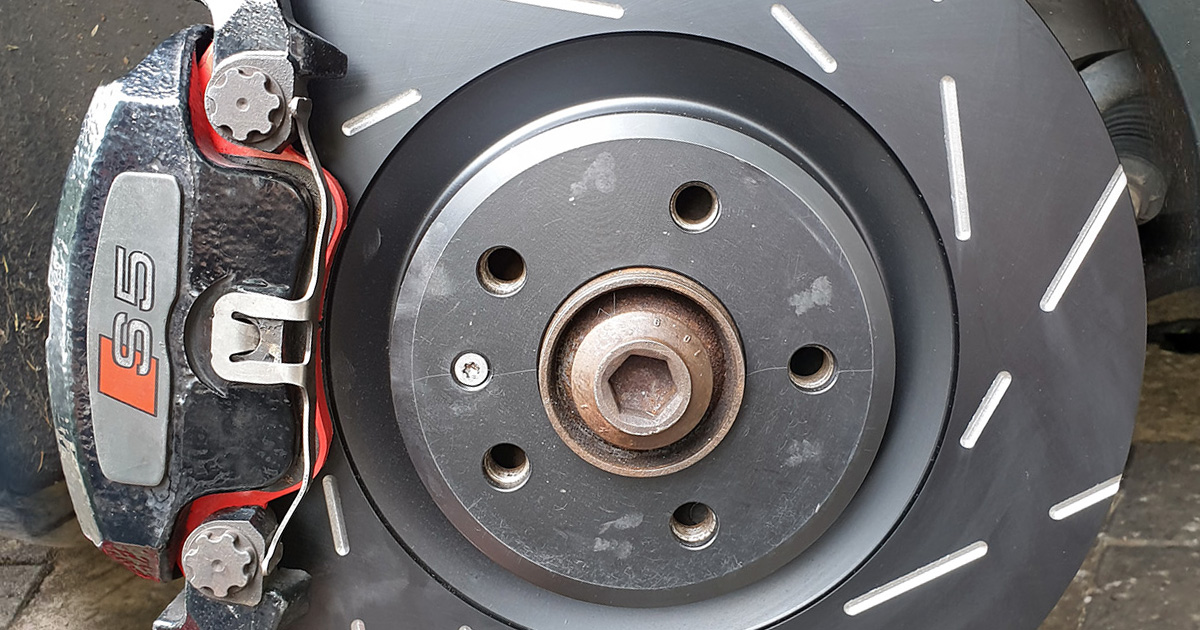
Identifying The Brake Sensor Location
The brake sensor’s position can vary between vehicle makes and models:
| Vehicle Type | Common Sensor Locations |
|---|---|
| Sedans and Hatchbacks | In proximity to the brake pads, within the wheel hub area. |
| SUVs and Trucks | Mounted on the brake caliper or behind the rotor. |
Consult your vehicle manual or an online database to pinpoint the exact location for your specific model. Remember, some vehicles have sensors on all wheels, while others may only have it on one axle.
Diagnosing Brake Sensor Issues
When the brake sensor in your vehicle starts to fail, you might notice delayed braking response or inconsistent behavior when applying the brakes. These sensors play a critical role in the functioning of your car’s anti-lock braking system (ABS). Understanding how to diagnose brake sensor issues properly can save you time and money, ensuring your vehicle remains safe to drive. Let’s delve into the signs of failure and preliminary testing methods.
Recognizing Common Brake Sensor Failure Signs
Being vigilant about the behavior of your car’s braking system can be the first line of defense against sensor-related issues. Identifying common signs of brake sensor failure is crucial. Watch out for:
- ABS warning light: The most apparent sign is the ABS light illuminating on your vehicle’s dashboard.
- Erratic ABS activation: If ABS engages randomly while braking, this could indicate a sensor problem.
- Loss of anti-lock feature: A failing sensor can lead to the ABS not working during heavy braking when it’s most needed.
- Inconsistent wheel speed readings: Mismatched speed readings from the sensors can result from contaminants or damage to the sensors.
- Brake pads wearing unevenly: This may also point to a malfunctioning brake sensor that’s not correctly regulating the brake pressure.
Performing A Preliminary Brake Sensor Test
Before diving into any replacements, conducting a preliminary brake sensor test can confirm whether the issue lies with the sensor. Follow these simple steps:
- Visual Inspection: Examine the brake sensor for any evident damage or excessive grime buildup that might interfere with its operation.
- Check the Wiring: Ensure that the wiring and connections are secure and free of corrosion.
- Use a Multimeter: Test the brake sensor’s resistance and compare it to the standard values specified in the vehicle’s repair manual.
- Wheel Spin Test: With the vehicle lifted, spin the wheel by hand and observe the ABS sensor’s output voltage. It should increase with the wheel’s speed.
A systematic approach to diagnosing brake sensor issues not only helps pinpoint the exact cause but also helps you avoid replacing parts unnecessarily.
How To Fix Brake Sensor: Step-by-step
Ensuring your vehicle’s safety features operate correctly is paramount, and the brake sensor is no exception. A faulty brake sensor can lead to a lack of responsiveness or false warnings, potentially endangering your driving experience. Fixing a brake sensor is a process you can undertake with a bit of automotive know-how and the right tools. Follow this comprehensive guide to replace a defective brake sensor and keep your braking system in optimum condition.
Accessing The Brake Sensor
Before you begin, ensure your vehicle is parked on a flat surface and the engine is turned off. Use wheel chocks to secure the vehicle and prevent rolling. Locate the sensor, which is typically situated near the brake pedal for interior sensors or at the wheels for exterior sensors. You might need to remove a few components to reach the sensor, so keep your toolbox handy.
Removing The Faulty Brake Sensor
Once you have located the sensor, disconnect the electrical connector carefully. You may need to release a safety clip or a locking tab depending on the vehicle model. After the connector is free, remove any mounting bolts or clips holding the sensor in place. A table can be useful to organize the steps:
| Step | Action |
|---|---|
| 1 | Disconnect electrical connector |
| 2 | Release safety clip/locking tab |
| 3 | Remove mounting bolts/clips |
Installing The New Brake Sensor
With the old sensor removed, it’s time to install the new one. Start by positioning the new sensor in place and secure it with the mounting hardware you previously removed. Do not overtighten, as this may damage the sensor. Once in place, reconnect the electrical connector, ensuring a firm and secure fit with a click sound indicating a proper connection. An itemized list will prevent missing any vital step:
- Position the new sensor
- Secure with bolts/clips
- Reconnect electrical connector
Ensuring The Sensor Is Properly Aligned
Proper alignment is crucial for the brake sensor to function accurately. Check the manufacturer’s specifications for any alignment requirements. In some cases, you may need to use a special tool or follow a particular procedure to align the sensor correctly. Once aligned, test the sensor by pressing the brake pedal. Look for the brake lights to activate without delay or error messages on the dashboard.
Confirm the repair with a test drive under safe conditions. Monitor the behavior of the brakes closely on your test drive, paying special attention to any dashboard lights or unusual braking feedback. If all goes well, you’ve successfully learned how to fix a brake sensor!
Quick & Safe Diy Guide Compliance
Welcome to our Quick & Safe DIY Guide Compliance for fixing your brake sensor, tailored for the hands-on car owner. A malfunctioning brake sensor often leads to dashboard warning lights and impaired vehicle safety. By following this straightforward guide, you can confidently restore your brake system’s reliability without sacrificing safety. This step-by-step process ensures that even novices can execute repairs compliant with safety standards.
Double-checking All Connections
Ensuring your brake sensor functions correctly starts with double-checking all connections. Loose or corroded connections can often be the culprit behind a faulty brake sensor. Grab your vehicle’s service manual and locate the sensor. Proceed as follows:
- Turn off the engine and ensure the vehicle is in a stable position.
- Locate the brake sensor connection, referring to the service manual for guidance.
- Carefully inspect the wires and connectors for any signs of damage or corrosion.
- If necessary, clean the connections with an appropriate electrical contact cleaner.
- Securely reconnect any loose wires and apply dielectric grease to prevent future corrosion.
Clearing Error Codes After Installation
Once you’ve replaced or reconnected the brake sensor, clearing any error codes is a critical next step. Modern vehicles store error codes in the onboard computer, which could influence the performance of your braking system. Follow these instructions:
- Use an OBD-II scanner to read and clear any stored brake sensor error codes.
- Connect the scanner to the OBD-II port, usually found under the dashboard.
- Follow the scanner’s prompts to retrieve and clear the codes.
- If you don’t own a scanner, local auto parts stores often provide scanning services for free.
- Start the engine to ensure the dashboard warning light has turned off.
- Take a test drive to confirm the functionality of the new sensor.
Repairing your brake sensor at home is not only satisfying, but also cost-effective. With the right tools and guidance, you can ensure your vehicle remains safe and compliant. Remember, regular checks and maintenance are your first defense against brake sensor issues.
Finalizing The Brake Sensor Installation
The final steps of a brake sensor installation are crucial to ensure your vehicle’s brakes function properly. After physically installing a new brake sensor, it is necessary to perform thorough checks to validate the success of the installation. These checks include testing the brakes, monitoring the vehicle’s initial drive post-repair, and knowing when to seek professional assistance. Let’s dive into these final steps to ensure your vehicle’s safety and performance.
Testing Brakes After Sensor Replacement
Once your new brake sensor is in place, the first test is to ensure that the brakes respond correctly. Begin by:
- Starting the engine and allowing it to run for a few minutes. This lets the system’s diagnostics check for any immediate issues.
- Pressing the brake pedal gently at different speeds in a safe, controlled environment. Confirm that there are no warning lights activated on the dashboard.
- Checking for unusual noises or resistance when the brakes are applied. Either could suggest that the sensor is not aligned properly or there’s an issue with the braking system.
Running a diagnostic tool can also help detect any fault codes related to the brake sensor. These codes might not trigger a warning light, so using a diagnostic tool can give you a deeper insight into the health of your brake system.
What To Monitor In The First Drive Post-repair
Your initial drive after replacing a brake sensor is a critical period for observation:
- Pay attention to the brake warning light; it should remain off if the sensor is working correctly.
- Notice the braking response time. Delayed response can indicate an issue with the installation.
- Monitor the overall brake performance. If the vehicle pulls to one side or if there’s a grinding sound, this could point to a problem that requires immediate attention.
It is important to drive cautiously and avoid harsh braking during the first few drives to allow the new sensor to integrate smoothly with your braking system.
When To Seek Professional Assistance
If you encounter any of the following scenarios, seek professional help immediately:
| Issue | Recommended Action |
|---|---|
| Persistent warning lights | Get the system diagnosed by a technician. |
| Uneven braking | Visit a mechanic to check the brake pads and discs. |
| Unusual brake behaviors | Have a complete brake system evaluation. |
Remember that working with the brake system can affect the safety of your vehicle. For peace of mind and assurance of quality, seeking out a professional mechanic or automotive specialist is always recommended if you are uncertain about any aspect of the brake sensor installation process.
Credit: andybucks5.blogspot.com
Frequently Asked Questions On How To Fix Brake Sensor
How Much Does It Cost To Fix A Brake Sensor?
The cost to replace a brake sensor typically ranges from $50 to $150, parts and labor included. Prices may vary based on vehicle model and labor rates.
Can You Drive A Car Without Brake Sensors?
Yes, you can drive a car without brake sensors, but it is not safe. Brake sensors provide critical safety alerts, and driving without them increases the risk of brake failure and accidents. Always prioritize vehicle safety features.
Do You Need To Replace Brake Sensors?
Yes, you need to replace brake sensors if they’re faulty or worn out to ensure braking system accuracy and safety.
Why Is My Brake Sensor Light On?
The brake sensor light may illuminate due to worn brake pads, sensor malfunction, or a fault in the braking system. It’s essential to check the brake pads and sensor wiring for issues.
Conclusion
Tackling a faulty brake sensor isn’t just about safety—it’s about peace of mind. Through following the steps outlined, you can ensure your vehicle remains reliable and responsive. Remember, regular maintenance is key. With your sensor fixed, you’re back in control, ready for the road ahead.
Disclosure: As an Amazon Associate, I may earn from qualifying purchases at no extra cost to you. Amazon and the Amazon logo are trademarks of Amazon.com, Inc, or its affiliates.
- Amazon, Amazon Prime, the Amazon logo and Amazon Prime logo are trademarks of Amazon. com, Inc. or its affiliates.

I am Sadman, the founder of CarSensorHub.com, where I share my passion for cars and technology. I specialize in writing detailed reviews and helpful guides on car gadgets, accessories, safety tools and many more. My mission is to help car owners discover the best products and tips to improve their driving experience and stay safe on the road.


