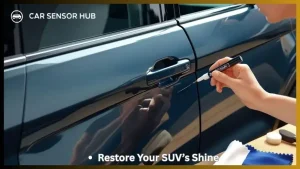
Has your Ford Explorer’s paint started to chip or scratch? You don’t have to live with those annoying blemishes or rush to the shop for expensive repairs.
Imagine restoring your vehicle’s look with just a little time and effort—right at home. In this guide, you’ll learn exactly how to apply touch-up paint on your Ford Explorer step by step. By the end, your SUV will look fresher and more polished, protecting it from rust and wear.
Ready to bring back that smooth, flawless finish? Let’s get started.

Credit: www.amazon.ca
Gathering Materials
Before applying touch-up paint on your Ford Explorer, gathering the right materials is crucial. Having the correct paint and tools helps you achieve a smooth and lasting finish. Preparation saves time and avoids mistakes during the process.
Choosing The Right Paint
Select paint that matches your Ford Explorer’s color exactly. Check the paint code on the vehicle’s door jamb or owner’s manual. Purchase touch-up paint from a trusted source or Ford dealer. Use paint designed for automotive use to ensure durability. Avoid generic paints that may not blend well.
Essential Tools Needed
Prepare a clean workspace with good lighting. Gather fine sandpaper to smooth scratches before painting. Use a small brush or paint pen for precise application. Have rubbing alcohol or a cleaner to remove dirt and grease. Keep a microfiber cloth ready to wipe the area gently. A clear coat can protect and seal the paint after application.
Credit: www.paintscratch.com
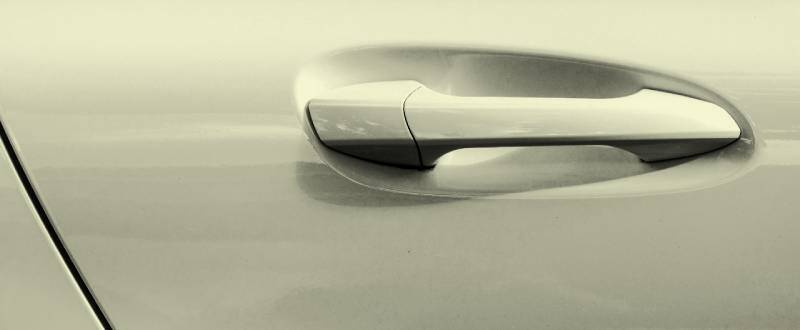
Preparing The Surface
Preparing the surface is the key step before applying touch-up paint on your Ford Explorer. A clean and smooth area helps the paint stick better. It also ensures a neat and lasting finish. Taking time here saves effort later.
Cleaning The Area
Start by washing the damaged spot with soap and water. Remove all dirt, grease, and dust. Use a soft cloth or sponge for gentle scrubbing. Rinse well and let the area dry completely. Cleanliness prevents paint from peeling off.
Sanding For Smoothness
Use fine-grit sandpaper to smooth out the chipped or rough edges. Lightly sand the area until it feels even. This step helps the new paint blend with the old paint. After sanding, wipe the spot with a damp cloth to clear dust. Let it dry before applying paint.
Read More: How to Install Running Boards on Ford Explorer
Applying Primer
Start by cleaning the damaged area thoroughly. Apply a thin layer of primer to help the paint stick better and last longer. Let the primer dry completely before painting.
Selecting The Primer
Primer is important for a smooth paint finish on your Ford Explorer. It helps paint stick better and protects the metal from rust. Choose a primer made for automotive use. Look for one that matches the paint type you will use, like enamel or lacquer. Make sure the primer is compatible with your vehicle’s surface. Check the label for compatibility with Ford vehicles or steel surfaces.
Proper Primer Application
Clean the damaged area well before applying primer. Remove dirt, grease, and old paint flakes. Use fine sandpaper to smooth the surface. Apply the primer in thin, even layers. Hold the spray can or brush about 6 to 8 inches from the surface. Let each layer dry for at least 10 minutes. Apply 2 to 3 layers for good coverage. Avoid thick coats to prevent drips and runs. After the final coat, let the primer dry fully before painting.
Painting Process
The painting process is a key step in restoring your Ford Explorer’s finish. It helps cover scratches and chips with new color. This process needs patience and care. Proper painting can make the repair last longer and look smoother. Follow each step carefully for the best results.
Mixing The Paint
Start by shaking the touch-up paint bottle well. This mixes the color evenly. Use a small container if needed. Pour some paint into the container. Stir gently with a clean stick. Avoid adding too much paint at once. Proper mixing ensures a smooth, even color.
Applying Touch-up Paint
Use a fine brush or applicator for small areas. Dip it lightly into the paint. Gently apply thin layers to the damaged spot. Avoid heavy paint that can drip or clump. Let each layer dry before adding more. Smooth strokes give a neat finish.
Multiple Coats And Drying Time
Apply more than one coat for full coverage. Wait 10 to 15 minutes between layers. This helps the paint dry and set. Avoid rushing the process to prevent smudges. After the final coat, let it dry for at least one hour. Proper drying ensures a strong, lasting repair.
Finishing Touches
Finishing touches make your Ford Explorer’s touch-up paint look smooth and natural. This step protects the paint and blends it with the rest of the car’s surface. Taking time here ensures long-lasting results and a professional look.
Applying Clear Coat
Clear coat seals the touch-up paint. It adds shine and protects against scratches and weather. Use a small brush or spray for even coverage. Apply thin layers to avoid drips. Let each layer dry fully before adding the next. Clear coat helps the paint last longer.
Polishing And Blending
Polishing smooths the surface and blends new paint with old. Use a fine polishing compound and a soft cloth. Rub gently in small circles. This step removes rough edges and makes the paint less noticeable. Blending helps the repair match the car’s original finish. It gives your Ford Explorer a flawless look.
Maintenance Tips
Proper care after applying touch-up paint on your Ford Explorer keeps the finish fresh. Maintenance helps the paint last longer and stay bright. Following simple tips protects your vehicle from new damage.
Small steps make a big difference in preserving the paintwork. It keeps your Explorer looking neat and prevents rust or fading.
Protecting The Painted Area
Let the touch-up paint dry completely before touching the area. Avoid washing the spot for at least a week. Use gentle car wash soap and soft cloths to clean near the repair.
Apply a good quality wax after the paint cures. Wax adds a protective layer against dirt and sunlight. Try not to park your vehicle under direct sun for long periods. Shade slows down paint fading and cracking.
When To Seek Professional Help
Choose experts for large scratches or deep dents. Professionals have tools and skills to fix complex damage. They ensure color matches perfectly and the surface is smooth.
Visit a body shop if the paint bubbles or peels after touch-up. This may signal underlying rust or poor surface prep. Early professional care avoids bigger repair bills later.
Credit: www.paintscratch.com
Frequently Asked Questions
How Do I Prepare My Ford Explorer For Touch-up Paint?
Clean the scratched area thoroughly to remove dirt and grease. Use fine sandpaper to smooth the surface. Ensure the area is dry before applying paint for better adhesion and finish.
What Type Of Touch-up Paint Matches Ford Explorer?
Use Ford-approved touch-up paint matched to your Explorer’s exact color code. Find the code on your vehicle’s door jamb or owner’s manual for perfect color accuracy.
How Long Does Touch-up Paint Take To Dry On Ford Explorer?
Touch-up paint usually dries to the touch within 30 minutes. Full curing can take up to 24 hours. Avoid washing or heavy contact during this time for best results.
Can I Apply Touch-up Paint Without Professional Help?
Yes, you can apply touch-up paint yourself with proper tools and patience. Follow instructions carefully for surface prep, paint application, and drying to achieve a smooth finish.
Final Thoughts
Applying touch-up paint on your Ford Explorer helps keep it looking good. Clean the area well before you start. Use small amounts of paint for best results. Let each layer dry fully to avoid smudges. Take your time and be patient.
This simple care can protect your vehicle’s finish. Regular touch-ups stop rust and damage early. Your Explorer will look fresh and well-maintained. A little effort goes a long way in car care. Keep tools handy and follow these easy steps.
You can do this yourself with confidence.
Disclosure: As an Amazon Associate, I may earn from qualifying purchases at no extra cost to you. Amazon and the Amazon logo are trademarks of Amazon.com, Inc, or its affiliates.
- Amazon, Amazon Prime, the Amazon logo and Amazon Prime logo are trademarks of Amazon. com, Inc. or its affiliates.

I am Sadman, the founder of CarSensorHub.com, where I share my passion for cars and technology. I specialize in writing detailed reviews and helpful guides on car gadgets, accessories, safety tools and many more. My mission is to help car owners discover the best products and tips to improve their driving experience and stay safe on the road.