Have you ever wished you could capture every moment on the road in your Ford F-150? A dash cam might be just what you need.
Installing a dash cam not only helps you document your adventures but also provides invaluable evidence in case of an accident. Imagine the peace of mind you’ll have knowing that your drives are being recorded! Whether you’re a tech enthusiast or someone who loves DIY projects, setting up a dash cam can be straightforward.
In this guide, you’ll discover how to easily install a dash cam in your Ford F-150. You’ll learn about the tools you need, step-by-step instructions, and tips to ensure your dash cam is perfectly positioned. So, buckle up and let’s make your driving experience safer and more exciting.
Don’t have a dash cam yet? Explore our picks for the Best Ford F-150 Dash Cams for sale to find the perfect match for your truck.

Credit: www.youtube.com
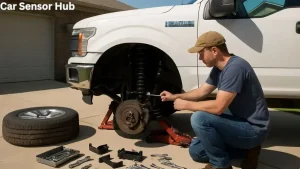
Tools And Materials Needed
Installing a dash cam in your Ford F-150 is a practical decision. It can enhance your driving experience and provide essential evidence in disputes. To ensure a smooth installation, gather the right tools and materials. This preparation prevents unnecessary delays and complications. Below, we detail the essential items needed for a successful installation.
Essential Tools For Dash Cam Installation
First, you’ll need a set of basic tools. A Phillips screwdriver is crucial for securing various parts. A trim removal tool helps in prying open panels without damage. A multimeter can check electrical connections. Don’t forget a wire stripper for preparing cables. Lastly, a rubber mallet can gently adjust panel positions.
Materials Required For Installation
You will need some specific materials for the dash cam. Purchase a quality dash cam that fits your F-150. Ensure it comes with a power cable and mounting bracket. Get some cable ties to organize wires neatly. If your dash cam uses a hardwire kit, buy one compatible with your vehicle. Electrical tape can secure loose connections.
Safety Gear To Consider
Safety should never be ignored during installation. Wear gloves to protect your hands from sharp edges. Safety goggles shield your eyes from dust and debris. A headlamp can provide better visibility in dark areas. These items ensure a safe and efficient installation process.
Credit: overdriveautotuning.com
Choosing The Right Dash Cam
Installing a dash cam in your Ford F-150 can be smart. It enhances safety and provides valuable footage during unexpected incidents. Choosing the right dash cam is crucial for optimal performance. Consider essential features and ensure compatibility with your Ford F-150.
Features To Consider
Dash cams come with various features. Look for high-resolution video quality. Night vision is important for recording in low light. Wide-angle lenses capture more of the road. Loop recording ensures continuous footage. Check for GPS functionality. This records location data along with video. Parking mode can be useful too. It records while your truck is parked.
Compatibility With Ford F-150
Not all dash cams fit every vehicle. Ensure your choice is compatible with Ford F-150. Check the power source requirements. Some dash cams use the cigarette lighter. Others need hardwiring into the vehicle’s electrical system. Size and mounting options matter. The camera should fit neatly on your windshield. Ensure easy installation without obstructing your view.
🔇 Want fewer distractions while driving? See our guide on How to Disable Seatbelt Chime Ford F-150 for more driving comfort.
Preparing Your Vehicle
Installing a dash cam in a Ford F-150 enhances safety and records your journeys. Begin by selecting a suitable dash cam model compatible with your vehicle. Follow step-by-step instructions to securely mount the camera and ensure optimal visibility.
Installing a dash cam in your Ford F-150 is a fantastic way to enhance your driving experience and add an extra layer of security. But before you jump into the installation process, it’s crucial to get your vehicle ready. This preparation not only ensures a smooth installation but also helps your dash cam function optimally. Let’s dive into the necessary steps to prepare your F-150 for a dash cam installation.
Cleaning The Interior
Before setting up your dash cam, give your truck’s interior a thorough cleaning. Dust and grime can obstruct your camera’s view, leading to unclear recordings. Start by wiping down the dashboard and windshield with a microfiber cloth to remove any dirt and smudges.
Don’t forget to clear away any clutter from the dashboard area. This will give you a clean slate to work with and prevent any obstructions when mounting your dash cam. A tidy interior not only makes the installation easier but also keeps your recordings clean and professional-looking.
Ensuring Power Source Accessibility
Your dash cam needs a reliable power source to function effectively. Check that your Ford F-150’s power outlets are accessible and in good working condition. Most dash cams use the cigarette lighter socket for power, so ensure it’s free of debris and functioning properly.
If you’re planning to use a hardwiring kit for a more permanent setup, identify a suitable fuse box location. Refer to your vehicle’s manual to understand which fuses are best for the dash cam connection. Have you considered using a power bank for added flexibility?
It’s a handy option for those who want to avoid tapping into the car’s electrical system. Preparing your vehicle might seem like an extra step, but it can make a significant difference in the long run. A clean and organized interior, along with accessible power sources, sets the stage for a successful dash cam installation. Wouldn’t you agree that starting on the right foot is crucial for any project?
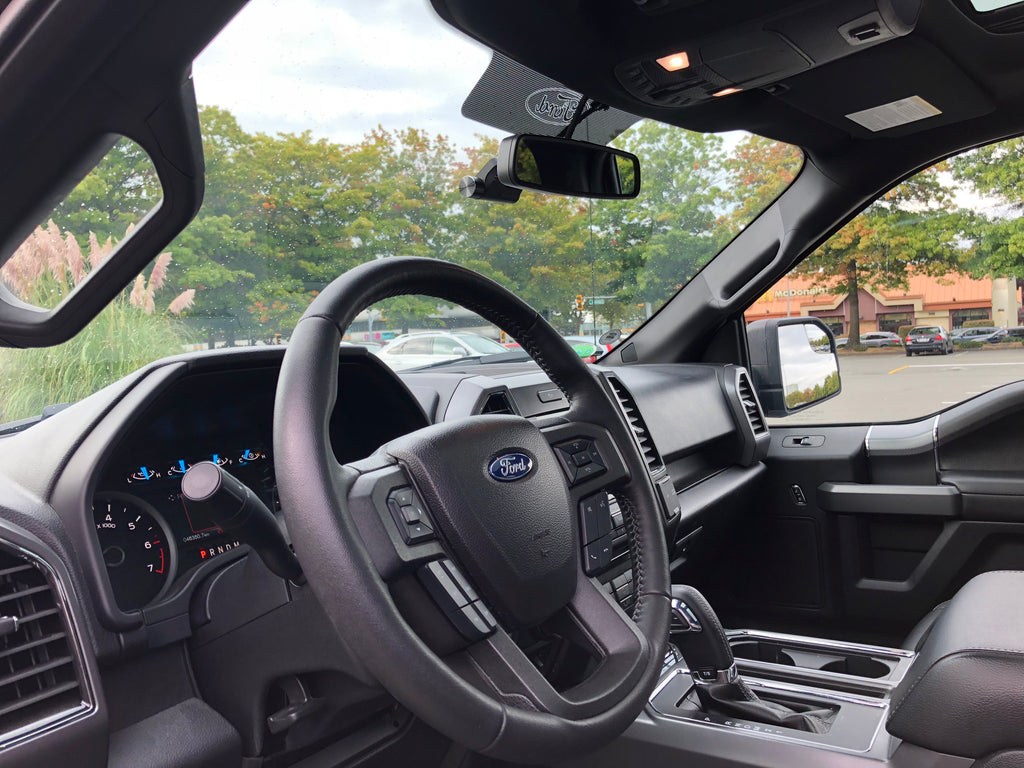
Positioning The Dash Cam
Secure your dash cam to the windshield behind the rearview mirror in your Ford F-150. This location provides a clear view of the road. Ensure all wires are neatly tucked for safety and aesthetics.
Positioning the dash cam correctly in your Ford F-150 is crucial. It ensures clear footage and avoids distractions while driving. A well-positioned dash cam captures everything on the road. It enhances safety and provides valuable evidence in case of incidents. Let’s explore optimal positioning techniques to help you get the best results.
Optimal Placement For Visibility
For the best view, place the dash cam near the rearview mirror. This location offers a wide view of the road ahead. Keep the lens centered for balanced footage. Make sure the camera angle captures both lanes. Avoid tilting the camera too high or low. This ensures you see road signs and license plates clearly.
Avoiding Obstructions
Ensure nothing blocks the dash cam’s view. Wipers or sun visors can obstruct footage. Avoid placing it too low on the windshield. This helps prevent dashboard reflections. Keep the area around the dash cam free of hanging items. Objects like air fresheners can block the lens. Regularly check for dirt or smudges on the camera. Clean the lens to maintain clear recordings.
Read More: Dash Cam for Ford F-150 With Rear Camera
Mounting The Dash Cam
Mount the dash cam in a Ford F-150 by attaching it to the windshield near the rearview mirror. Connect the power cable to the vehicle’s fuse box for a clean installation. Ensure the camera lens points towards the road for optimal recording.
Mounting the dash cam in your Ford F-150 is essential. Proper placement ensures clear footage. It also minimizes distractions while driving. There are two main ways to mount a dash cam. You can use adhesive mounts or suction cups. Each method has its benefits. Let’s explore these options.
Using Adhesive Mounts
Adhesive mounts offer a firm hold. They attach the dash cam securely to the windshield. Clean the area first with alcohol wipes. This removes dirt and grease. Peel the backing off the adhesive pad. Press the mount onto the chosen spot. Hold it there for a few seconds. This ensures a strong bond. Let it sit for a few hours before attaching the cam.
Securing With Suction Cups
Suction cups are flexible and easy to use. They allow for easy repositioning. Clean the windshield with a damp cloth. This helps the cup stick better. Moisten the suction cup’s rim slightly. Press it firmly against the glass. Flip the lever to create a vacuum seal. Check the suction regularly. Ensure it stays secure during drives. Adjust as needed for the best view.
Connecting The Power Supply
Ensure your dash cam is powered by connecting it to the Ford F-150’s fuse box. Use an add-a-circuit kit for a seamless connection. This setup provides a reliable power source, keeping your dash cam running smoothly.
Installing a dash cam in your Ford F-150 is a smart move to capture every on-road moment. One crucial step in this process is connecting the power supply. This ensures your dash cam runs smoothly without unexpected interruptions. Whether you choose to use the cigarette lighter or hardwire to the fuse box, each method has its own advantages. Let’s look at these options closely.
Using The Cigarette Lighter
Connecting the dash cam to the cigarette lighter is often the simplest method. It requires minimal technical skills, making it perfect for beginners. Just plug in the power cable to the cigarette lighter port, and you’re all set. This method provides a convenient way to power your dash cam instantly. However, remember that it might occupy the port you usually use for other devices. If you’re like many Ford F-150 owners who enjoy road trips, consider how often you use this port.
Having the dash cam connected here means it will only function when the vehicle is on. Ask yourself: Is this sufficient for your needs, or do you require continuous recording?
Hardwiring To The Fuse Box
For a more permanent solution, consider hardwiring your dash cam to the fuse box. This option keeps the cigarette lighter free for other gadgets. Plus, it allows the dash cam to operate even when the vehicle is off, if set up correctly. Start by identifying a fuse that provides power when the ignition is on. You can refer to your Ford F-150’s manual for this. Use an add-a-fuse kit to safely connect the dash cam power cable to the chosen fuse. Hardwiring might sound daunting, but with a little patience, it’s doable.
You get a cleaner look without visible wires hanging around. Before you start, ask yourself if you’re comfortable working with your vehicle’s electrical system. If not, professional help might be a wise choice. Whichever method you choose, ensure the dash cam is securely mounted and doesn’t obstruct your view. Your Ford F-150 deserves the best, and a properly installed dash cam can be your trusty co-pilot.
Routing The Cables
Position the cables carefully to ensure a clean installation of your dash cam in the Ford F-150. Tuck them into the vehicle’s trim, following existing channels for a neat appearance. Secure any loose ends to prevent tangling or obstruction while driving.
Installing a dash cam in your Ford F-150 is a brilliant way to ensure your safety and capture unexpected moments on the road. One crucial step in this process is routing the cables effectively. Proper cable management not only keeps your car looking neat but also ensures that the dash cam functions optimally. Let’s dive into some practical tips on how to do this efficiently.
Concealing Wires
Concealing the wires is essential for maintaining the aesthetic appeal of your Ford F-150. Start by tucking the cables into the headliner of your vehicle. The headliner is the fabric-covered board on the interior roof of your car. Use a trim tool to gently tuck the wire between the headliner and the windshield. This technique keeps the wires hidden and prevents them from obstructing your view.
You can also run the cables down the A-pillar, which is the vertical support on either side of the windshield. If you’re worried about damaging your car, don’t be. Many Ford F-150 owners successfully conceal wires using this method without causing any harm to their vehicle’s interior. Have you tried this before? What was your experience like?
Avoiding Interference With Vehicle Controls
When routing cables, it’s crucial to avoid interference with vehicle controls. You don’t want the wires to tangle with any moving parts or impede the use of essential controls. Plan your cable path to steer clear of pedals, gear shifts, and steering mechanisms. Run the cables along the edges of the dashboard and secure them with adhesive clips. These clips can be purchased from any auto store and help keep wires in place without damaging the car’s surfaces.
Double-check that the cables don’t block any air vents or sensors. This ensures that your driving experience remains uninterrupted. Is there a particular area in your car where wires tend to get in the way? Taking a few extra minutes to carefully route and secure your dash cam cables can save you from future headaches. Plus, it enhances the overall look of your vehicle, making the setup look professional and tidy. How will you start routing your cables today?
Testing The Dash Cam
After installing your dash cam in the Ford F-150, testing is crucial. Proper testing ensures everything works as expected. This will prevent future issues and provide peace of mind.
Checking Video Quality
Start by checking the video quality. Ensure the footage is clear and sharp. Look for any blurriness or distortions. Test during different times of day. Morning, afternoon, and night. This ensures the camera performs well in all lighting conditions. Make sure license plates and street signs are readable. Clear video can be crucial for any incidents.
Ensuring Continuous Recording
Continuous recording is essential. Check if the dash cam records seamlessly. There should be no gaps between video files. Review how the camera handles power. Does it start automatically with the engine? Does it stop recording when the engine is off? Verify the loop recording feature. This overwrites old footage to save space. Check if the camera alerts when storage is full. These features ensure you never miss important footage.
Troubleshooting Common Issues
Installing a dash cam in a Ford F-150 can present common issues like power connection difficulties and mounting challenges. Ensure proper installation by carefully routing cables and securely attaching the camera to avoid obstructing the driver’s view. Follow manufacturer instructions for the best results.
Installing a dash cam in your Ford F-150 is a straightforward process, but sometimes, unexpected hiccups can occur. Troubleshooting common issues ensures your dash cam operates smoothly and records crucial footage when needed. From power problems to connectivity errors, here’s how to tackle these challenges effectively.
Addressing Power Problems
Power issues can be frustrating, especially if your dash cam refuses to turn on. First, confirm that the power cable is securely connected to both the camera and the power source. Loose connections are often the culprit. If your dash cam still doesn’t power up, check the fuse associated with your vehicle’s power outlet. A blown fuse might be the reason, and replacing it can solve the problem.
Consider testing the dash cam with an alternative power source, such as another vehicle, to rule out a faulty camera or cable. Have you ever experienced a power issue with a device that was quickly resolved with a simple fix?
Resolving Connectivity Errors
Connectivity issues can prevent your dash cam from pairing with your smartphone or computer. Start by ensuring that your device’s Bluetooth or Wi-Fi is enabled and functioning. Sometimes, turning the connection off and back on can resolve the problem. Next, verify that your dash cam’s firmware is up-to-date. Manufacturers often release updates to fix bugs and improve connectivity. If updates are available, install them promptly. If problems persist, consult the user manual for specific troubleshooting tips or reach out to customer support.
Have you wondered how often simple updates fix tech glitches that seem unsolvable at first glance? Remember, addressing these common issues promptly can save you from potential headaches down the road. Keeping your dash cam in top shape ensures you capture every crucial moment on the road, providing peace of mind and security.
Maintenance Tips
Installing a dash cam in your Ford F-150 requires careful placement and secure wiring. Start by choosing a location with a clear view. Ensure the wires are neatly tucked to avoid obstruction. Proper installation enhances road safety and helps capture vital footage during journeys.
Installing a dash cam in your Ford F-150 is a smart move. It not only helps in documenting road trips but also serves as an essential tool during unexpected incidents. But, once installed, how do you ensure it remains in top-notch condition? Maintenance is key. Regular upkeep not only extends the lifespan of your dash cam but also ensures it functions efficiently when you need it most. Let’s dive into some easy maintenance tips that you can follow.
Cleaning The Lens
A clear lens equals clear footage. Dust and fingerprints are common culprits that blur your recordings. To keep your lens spotless, use a microfiber cloth to gently wipe it. Avoid using harsh chemicals as they can damage the lens. Instead, a mix of water and mild soap usually does the trick. Consider this: if your dash cam records an important event, a clean lens ensures details are captured accurately. Have you ever tried watching a movie with smudged glasses? Imagine how frustrating that is. Keep your lens clean for crystal-clear footage.
Updating Firmware
Manufacturers often release firmware updates to enhance performance or fix bugs. Keeping your dash cam’s firmware up-to-date is crucial. Check the manufacturer’s website regularly for updates. Download and install them as per the instructions provided. Think of firmware updates like keeping your phone’s software current.
Would you miss out on new features and security improvements? The same applies to your dash cam. Update it to enjoy optimal performance. Maintenance doesn’t have to be a chore. With these simple tips, you’re set to keep your dash cam running smoothly. After all, isn’t it better to prevent issues than to fix them later?
Frequently Asked Questions
Can I Install A Dash Cam By Myself?
Yes, you can install a dash cam yourself. Follow the manufacturer’s instructions carefully and use the proper tools. Ensure the camera is securely mounted, and the wiring is connected correctly. Check compatibility with your vehicle’s electrical system to avoid issues.
A DIY installation can save costs and time.
Can You Add Front Camera To F150?
Yes, you can add a front camera to an F150. Many aftermarket kits are available for installation. These kits often include necessary hardware and instructions. Ensure compatibility with your F150’s model year. Professional installation is recommended for optimal performance and integration with the existing system.
Do I Have To Tell Cops I Have A Dash Cam?
You are not legally required to inform police about a dash cam in your vehicle. Providing footage is your choice. Disclosing a dash cam might be beneficial if evidence could help your case. Always consult local laws or a legal expert for specific guidance.
How Much Does It Cost To Have A Dashcam Installed?
Dashcam installation costs vary from $50 to $200, depending on model and installation complexity. Professional installation may cost more. Consider DIY to save money, but ensure proper setup for best results. Always compare prices and read reviews before purchasing.
Dash Cam for Ford F-150 With Rear Camera.
Conclusion
Installing a dash cam in your Ford F-150 enhances safety. The steps are simple and quick to follow. Remember to choose a suitable location for the camera. Secure all wires properly to avoid tangles. Test the dash cam to ensure it works correctly.
A well-installed dash cam records vital footage during drives. This can be crucial in unexpected situations. Enjoy the peace of mind a dash cam provides. It’s a small investment for better road security. Hopefully, these tips make your installation process smoother.
Disclosure: As an Amazon Associate, I may earn from qualifying purchases at no extra cost to you. Amazon and the Amazon logo are trademarks of Amazon.com, Inc, or its affiliates.
- Amazon, Amazon Prime, the Amazon logo and Amazon Prime logo are trademarks of Amazon. com, Inc. or its affiliates.

I am Sadman, the founder of CarSensorHub.com, where I share my passion for cars and technology. I specialize in writing detailed reviews and helpful guides on car gadgets, accessories, safety tools and many more. My mission is to help car owners discover the best products and tips to improve their driving experience and stay safe on the road.