To test a bad O2 sensor, use an OBD2 scanner to check for trouble codes, or monitor live data for irregular sensor activity. Perform a multimeter test to measure sensor voltage output.
Understanding the health of your vehicle’s oxygen sensor is crucial for maintaining optimal engine performance and fuel efficiency. The O2 sensor, part of the emission control system, measures the oxygen levels in the exhaust gases and informs the engine’s computer to adjust the air-fuel mixture.
An improperly functioning O2 sensor can lead to a variety of issues, including poor gas mileage, increased emissions, and engine misfires. As a driver, knowing how to check for a failing O2 sensor can save you time and money on diagnostics and repairs. Knowledgeable enthusiasts and DIY mechanics can often diagnose a faulty sensor using the right tools and techniques. This practical approach to vehicle maintenance ensures your engine runs smoothly while also possibly extending the lifespan of your oxygen sensor.
A car owner notices a drop in mileage, rough idle, or engine light, confirms it’s a bad O2 sensor, and now wants to Buy a full Replacement Kit — ideally compatible, affordable, and DIY-ready.
Signs Of A Failing O2 Sensor
Is your car acting up, and you suspect the O2 sensor might be to blame? Spotting the early signs of a failing O2 sensor can save you from larger engine problems down the road. This essential component monitors oxygen levels in your vehicle’s exhaust. It helps manage fuel efficiency and emissions. When it fails, it can lead to a range of issues. Recognizing these signs is crucial for timely repairs.
Unusual Fuel Consumption
A clear sign of a bad O2 sensor is a sudden change in fuel economy.
Your car might start draining fuel faster than usual. This is because the faulty sensor sends incorrect data to the car’s computer. As a result, the engine might burn more fuel than needed. Keep an eye on your fuel gauge. If you notice you’re filling up more often, it’s time for a check-up.
Irregular Engine Performance
Another alarming signal is when your engine doesn’t run smoothly. A bad O2 sensor can cause rough idling, stalling, or difficulties when starting the car. You might experience unexpected surges or drops in power. This happens when the sensor doesn’t provide the right mix of air and fuel. Engine performance issues should never be ignored. They can lead to more serious damage.
| Sign | Possible Cause | Action Required |
|---|---|---|
| Inconsistent Idling | Faulty O2 Sensor | Check Sensor |
| Decreased Mileage | Incorrect Fuel Consumption | Inspect Fuel System |
Monitoring these signs ensures you catch a failing O2 sensor early. This prevents further complications and ensures your vehicle runs efficiently. If you notice either of these signs, schedule a visit with a mechanic. They can diagnose and replace a faulty O2 sensor if necessary.
Credit: www.youtube.com
The O2 Sensor Explained
An O2 Sensor is a key component of your car’s emissions system. It helps manage fuel efficiency and reduce harmful emissions. Understanding how it works can save you time and money on repairs. Let’s explore the function of an O2 Sensor and the types available.
Oxygen Sensor Function
The job of an O2 Sensor, also known as an Oxygen Sensor, is important. It measures the oxygen levels in exhaust gases. This information helps your car’s engine to mix the right amount of fuel with air. This mixture keeps the engine running well. A bad O2 Sensor can cause performance issues such as rough idling and increased emissions.
Types Of O2 Sensors
- Zirconia Sensors: Common in older vehicles. These need high temperatures to work.
- Titanium Sensors: They operate at lower temperatures. They change resistance with oxygen levels.
- Wideband Sensors: These give precise readings. They’re found in newer, fuel-efficient cars.
Different car models may use different types of O2 Sensors. Check your vehicle’s manual to see which type you need.
Essential Tools For O2 Sensor Testing
The right tools make O2 sensor testing simple and accurate. Whether a seasoned pro or a DIY enthusiast, gather these must-have tools first. They ensure a smooth diagnostic process. Read on to know what you need!
Digital Multimeter
A digital multimeter measures voltage, current, and resistance. It checks an O2 sensor’s functionality. Ensure it has a high impedance input for accurate voltage readings.
Table for Digital Multimeter Features| Feature | Function |
|---|---|
| Voltage Test | Check signal voltage |
| Resistance Test | Ensure internal coil integrity |
Obd-ii Scanner
An OBD-II scanner reads error codes from the car’s onboard computer. It pinpoints issues with the O2 sensor.
Bullet Points for OBD-II Scanner Advantages- Read and erase trouble codes
- Monitor live data
- Check readiness monitors
Protective Gear
Safety first! Use protective gear to prevent injuries.
Ordered List for Protective Gear- Gloves – Shield hands from heat and chemicals
- Eye Protection – Keep eyes safe from debris

Credit: www.amazon.com
Preparing For The Diagnostic Process
Welcome to the crucial first step in diagnosing a faulty oxygen (O2) sensor: preparing for the diagnostic process. Ensuring proper preparation helps you safely and effectively pinpoint issues. Follow this guide to start your diagnostic journey on the right foot.
Safety Precautions
Safety should be your top priority. Working on a vehicle comes with hazards. Remember to:
- Work in a well-ventilated area to avoid exhaust fumes.
- Let the vehicle cool down before touching any parts to prevent burns.
- Wear safety goggles and gloves to protect your eyes and hands.
- Keep a fire extinguisher nearby in case of emergencies.
Vehicle Preparation
Proper vehicle setup ensures a smooth diagnostic process. Take these steps before testing the O2 sensor:
- Ensure the engine is off and the key is out of the ignition.
- Disconnect the battery to safeguard against electrical shocks.
- Locate the O2 sensor; refer to the vehicle’s manual if needed.
- Clean the sensor’s area to avoid debris interfering with the test.
Gather the necessary tools, including a digital multimeter and back-probe. These are essential for accurate readings.
Visual Inspection Steps
Before diving into complex diagnostics, a good first step is checking for physical damage and wiring issues on your O2 sensor. Let’s look at how to spot these problems.
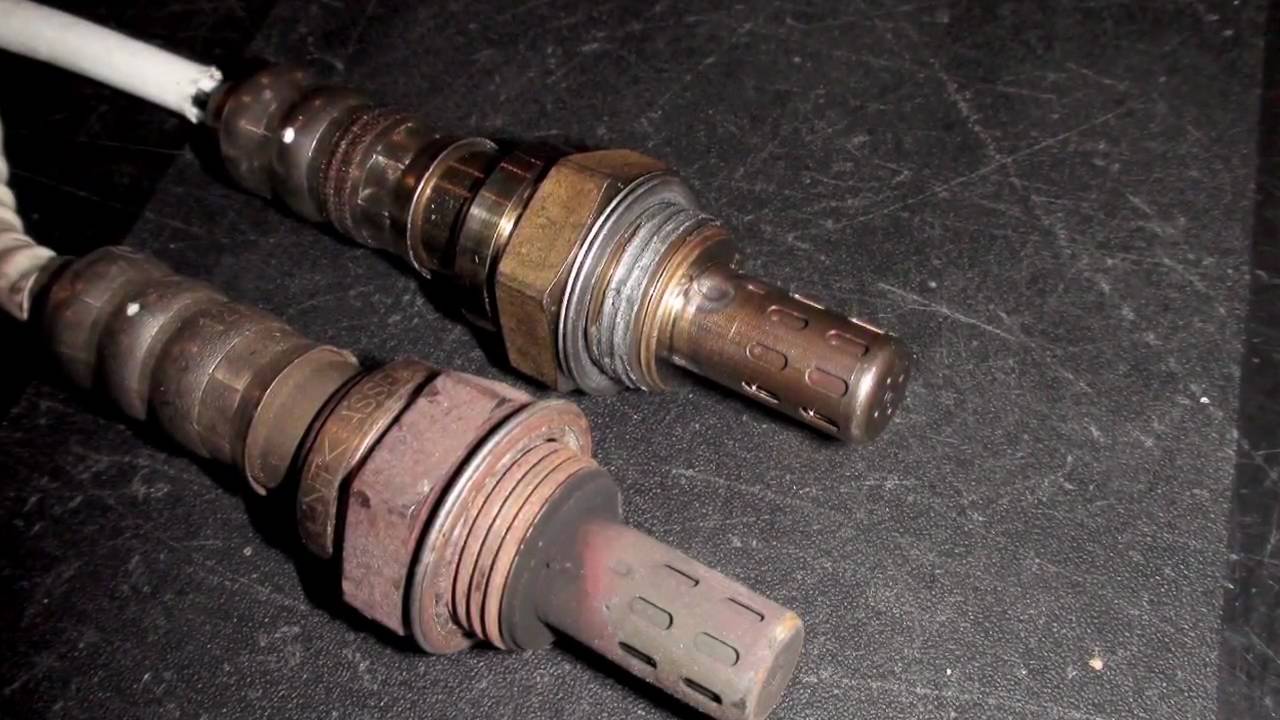
Checking For Physical Damage
A visual check can reveal a lot about an O2 sensor’s condition.
- Inspect the sensor’s body for any signs of cracks or damage.
- Look for soot or contaminants that may impede functionality.
- Examine the exhaust system around the sensor for rust or damage.
Assessing Wiring And Connectors
Wires and connectors are essential for an O2 sensor’s operation.
- Check the wiring harness for any signs of wear or fraying.
- Ensure connectors are tight and free from corrosion.
- Test for continuity with a multimeter if you suspect wiring issues.
| Check | What to Look For | Action |
|---|---|---|
| Sensor Body | Cracks, damage | Replace if damaged |
| Contaminants | Soot, oil, debris | Clean or replace |
| Wiring Harness | Wear, fraying | Repair or replace |
| Connectors | Loose, corroded | Clean or tighten |
By following these visual inspection steps, you can quickly determine if your O2 sensor is bad. Simple checks save time and money before moving on to more in-depth testing.
Electrical Testing Techniques
Diagnosing a faulty O2 sensor requires precise electrical testing techniques. Understanding voltage and resistance measurements are essential for an accurate diagnosis. The following steps guide you through the best practices of testing an O2 sensor.
Voltage Check Procedure
To begin testing an O2 sensor’s voltage, you need a digital multimeter set to the voltmeter mode.
- Locate the O2 sensor and disconnect its wiring harness.
- Turn the vehicle’s ignition to the “ON” position, without starting the engine.
- Connect the multimeter’s red lead to the O2 sensor signal wire and the black lead to a good ground.
- Monitor the voltage reading. A healthy O2 sensor will typically show a fluctuating voltage between 0.1 and 0.9 volts.
- Compare the readings to the manufacturer’s specifications.
Resistance Testing
Resistance testing checks the O2 sensor’s internal heating element.
- Turn off the vehicle and allow it to cool.
- Disconnect the O2 sensor completely from the vehicle.
- Set your multimeter to the ohmmeter setting to measure resistance.
- Place the multimeter’s probes on the sensor’s heater circuit terminals.
- Look for a specified resistance value, usually found in the service manual.
- If the reading is outside the specified range, the heater circuit is bad.
Using An Obd-ii Scanner
Using an OBD-II Scanner is a crucial method for diagnosing vehicle issues. This tool reads information from your car’s onboard diagnostics system. It helps identify the root cause of engine trouble.
Understanding Trouble Codes
When an O2 sensor fails, your vehicle’s Onboard Diagnostics II (OBD-II) system generates trouble codes. Plug the OBD-II scanner into the port, usually beneath the steering wheel. Once connected, turn on the ignition without starting the engine. The scanner retrieves codes that pinpoint sensor issues. Look for codes that start with “P013” followed by another number. These codes indicate problems with the O2 sensor or its circuit.
Real-time Data Analysis
The OBD-II scanner also provides access to real-time data from your vehicle’s sensors. Monitor the oxygen sensor’s output while the engine runs. Normal readings fluctuate rapidly, showing the sensor’s response to changes in oxygen levels. A bad sensor may show a flatlined or fixed voltage signifying it is not responding correctly. Compare these findings with manufacturer specifications to confirm sensor health.
- Turn on OBD-II scanner and select live data.
- Find the data stream for O2 sensors.
- Observe the voltage readings.
- Check for consistency with expected values.
Regular maintenance and swift response to OBD-II trouble codes can prevent costly repairs. Use this tool to keep your vehicle running smoothly.

Credit: www.amazon.com
Interpreting Test Results
Interpreting test results for a bad O2 sensor is crucial to diagnosing vehicle issues. Understanding the data you collect is key. Let’s dive into how to analyze your findings effectively.
Analyzing Voltage Fluctuations
The O2 sensor outputs voltage that fluctuates. A healthy sensor will show voltage changes from about 0.1 to 0.9 volts. Rapid voltage shifts indicate the sensor is responsive and functioning well.
Perform these steps to analyze voltage:
- Connect the sensor to a voltmeter.
- Warm up the engine to operating temperature for accurate readings.
- Monitor the voltmeter, noting the voltage fluctuation patterns.
Look for these signs:
- A good sensor will fluctuate regularly.
- A failing sensor may have slow or no fluctuations.
Comparing With O2 Sensor Specifications
Next, compare your data to the manufacturer’s specifications. These details provide the expected performance range for a healthy O2 sensor.
Obtain the specs from:
- The vehicle’s service manual.
- Online databases with manufacturer data.
Match your data against these specs:
| Specification | Expected Value | Your Reading |
|---|---|---|
| Voltage Range | 0.1V – 0.9V | Insert Your Value |
| Response Time | Under XX Seconds | Insert Your Value |
If your readings fall outside the expected range, the O2 sensor may be faulty.
When To Replace The O2 Sensor
Your vehicle’s O2 sensor plays a critical role in managing fuel efficiency and emissions. Like any car component, it will eventually need replacing. Recognizing the right time to switch out your oxygen sensor is crucial. It keeps your engine running smoothly and maintains optimal performance.
Life Expectancy Of An O2 Sensor
Most O2 sensors will last around 60,000 to 90,000 miles. A variety of factors, like fuel quality and engine performance, can impact this range. Consult your car’s manual for specific recommendations. An aging sensor may cause lower gas mileage and a rough-running engine. Here’s a quick checklist to help identify a failing O2 sensor:
- Check engine light is on
- Engine idles roughly
- High fuel consumption
- Failed emissions test
- Odd smells from the exhaust
Cost-benefit Analysis Of Replacement
When considering a replacement, weigh the costs against potential benefits. Delaying replacement can lead to more expensive repairs. Here’s a table to break down the costs:
| Repair Item | Cost |
|---|---|
| O2 Sensor Part | $20-$100 |
| Professional Labor | $50-$150 |
| Potential Savings (Fuel Efficiency) | $100+ yearly |
Replacing a bad O2 sensor can save you money in the long term. A well-maintained sensor ensures a well-performing engine and lower emissions.
You might try a simple test at home to check your O2 sensor. Sometimes, a good cleaning can improve performance and delay replacement. If problems persist, consider getting a professional inspection to verify if a replacement is needed.
Diy Replacement Tips
Tackling a bad O2 sensor? DIY replacement can save money and time. Follow these steps to ensure success:
Step-by-step Sensor Replacement
- Turn off the engine and let it cool.
- Locate the O2 sensor to replace. Check the vehicle manual for guidance.
- Use an OBD II scan tool to confirm the sensor’s fault code.
- Disconnect the car battery to ensure safety.
- Wear safety gloves and remove the faulty sensor with an O2 sensor socket.
- Compare the new sensor with the old to ensure a match.
- Screw in the new sensor by hand, then tighten with the socket.
- Reconnect the sensor’s wire clip.
- Reconnect the car battery and start the engine.
- Perform another scan to confirm the new sensor functions correctly.
Ensuring Correct Installation
- Review the sensor’s installation guide carefully.
- Cross-check the sensor’s part number with your car’s model and make.
- Ensure the wiring harness matches and clips in snugly.
- After installation, inspect for leaks or loose fittings.
- Use a torque wrench for accurate tightening. Refer to the manual for specs.
- Test drive the car to ensure the sensor’s proper functionality.
Common Mistakes To Avoid
Testing a bad O2 sensor requires precision and attention to detail. Many DIY enthusiasts and professionals alike fall prey to simple errors that could compromise test results and lead to incorrect diagnoses.
Already tested your sensor? Explore the Best O2 Sensor Replacement Kits that suit your car model and budget.
Overlooking Sensor Calibration
One common mistake is skipping the crucial step of sensor calibration. New O2 sensors often need calibration to function properly.
Out-of-the-box settings might not align with your vehicle’s needs. Always recalibrate after installation to ensure accurate readings.
Ignoring Manufacturer Guidelines
Manufacturers provide specific instructions for a reason. Ignoring these guidelines can lead to improper testing techniques.
- Always read the manual.
- Use recommended tools.
- Follow step-by-step processes.
| Step | Action |
|---|---|
| 1 | Locate the O2 sensor. |
| 2 | Disconnect the sensor. |
Ignoring these points can lead to false diagnostics and added costs. Stick to the guidelines for the best results.
Aftercare And Maintenance
Maintaining your vehicle’s O2 sensor is crucial after testing. Regular checks and careful handling boost performance and longevity. Let’s explore how to best care for your sensor post-testing.
Routine Checks
Regular monitoring is key in catching O2 sensor issues early. Follow these steps:
- Set reminders for inspection every six months.
- Use an OBD-II scanner to look for error codes.
- Note changes in fuel efficiency and engine performance.
- Check the electrical wiring and connectors for damage.
Long-term O2 Sensor Health
Longevity of your O2 sensor depends on your care habits. Here are vital tips:
- Avoid using leaded fuels and additives harmful to the sensor.
- Keep your engine in good shape; it affects O2 sensor life.
- Replace air and fuel filters at recommended intervals.
- Consult your vehicle’s manual for specific O2 sensor maintenance advice.
Frequently Asked Questions Of How To Test A Bad O2 Sensor
How Do I Identify A Failing O2 Sensor?
A failing O2 sensor often causes a check engine light to illuminate. It can also lead to poor fuel economy and rough idling. Watch for slower response times and decreased engine performance as these can be indicative of a sensor issue.
What Symptoms Indicate A Bad O2 Sensor?
Common symptoms of a bad O2 sensor include reduced fuel efficiency, a rough engine idle, engine misfires, and an illuminated check engine light. You may also notice a rotten egg smell from the exhaust due to incomplete combustion.
Can I Test An O2 Sensor At Home?
Yes, you can test an O2 sensor at home using a multimeter to check voltage variations. The sensor should fluctuate between 0. 1 and 0. 9 volts. A steady reading indicates it may be failing. Always check the manufacturer’s specifications first.
What Tools Are Needed To Test An O2 Sensor?
To test an O2 sensor, you’ll need a multimeter set to measure voltage, and possibly a backprobe or a breakout harness. A repair manual for your specific vehicle model can also be very helpful to provide the correct testing procedures.
Conclusion
Testing your O2 sensor is essential for maintaining a healthy vehicle. With the steps outlined, you’re now equipped to catch issues early. Regular checks prevent costly repairs and keep your car running efficiently. If you suspect a problem, don’t hesitate; test your sensor and drive with confidence.
Disclosure: As an Amazon Associate, I may earn from qualifying purchases at no extra cost to you. Amazon and the Amazon logo are trademarks of Amazon.com, Inc, or its affiliates.
- Amazon, Amazon Prime, the Amazon logo and Amazon Prime logo are trademarks of Amazon. com, Inc. or its affiliates.

I am Sadman, the founder of CarSensorHub.com, where I share my passion for cars and technology. I specialize in writing detailed reviews and helpful guides on car gadgets, accessories, safety tools and many more. My mission is to help car owners discover the best products and tips to improve their driving experience and stay safe on the road.